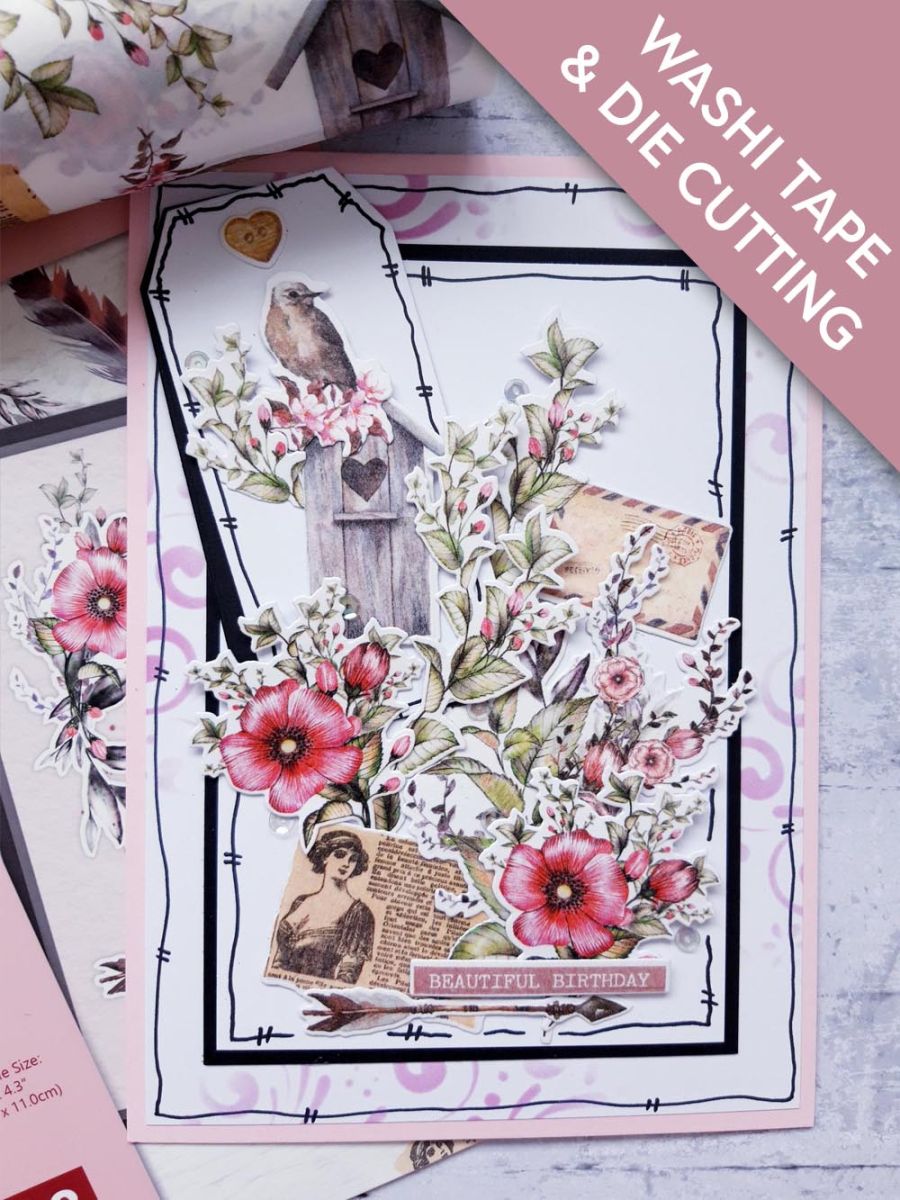
Beautiful Birthday Washi Tape Roll and Die Collection
Gem pick up and pokey tool
Paper Trimmer
Perfect Together Glue
Low tack tape
Foam Pads
Die Cutting machine
Tick what you have - this device remembers.
Step by step
tap a picture to see it big · tap DONE as you go - this device remembers
Step 1 of 17
Using the 2 dies as a guide, cut a full "drop" from the Beautiful Birthday washi tape roll.
Peel off a corner of the adhesive backing, then carefully roll it out as you stick it down on to the A4 white card. Once you are happy, you can "buff" it, to adhere it to the card permanently.
Step 2 of 17
Line up one of the dies on to the the washi tape, and hold in place with low tack tape.
Run it through your die cutting machine.
Place the second die in place, and die cut the rest of the washi.
Pop all your die cut, washi elements, to one side.
Step 3 of 17
Blend the pink Izink Pigment ink, through your chosen stencil, around the edges of the white card (7 3/4 x 5 1/4").
As this is a slow drying ink, dry it off with a heat tool to avoid any smudges!
Step 4 of 17
Once dry, adhere your stencilled background on to your pink, top folding, card blank.
Use a black pen to draw a decorative, wiggly frame, around it.
Set to one side.
Step 5 of 17
Using the tag die that measures approx 4 1/2 x 2 1/4", from the Thirsty Brush UnLtd Tagged Die Collection, cut out TWO tags. One from the white card and one from the black card (6 x 3 1/2").
Step 6 of 17
Use some of your die cut washi elements, to create a 3D display, in the bottom, right hand corner of the white card (6 1/2 x 4 1/4"). You can use both wet glue, and foam pads, to create depth and dimension to your layout.
Tip: Place all your die cut elements in place, BEFORE adhereing them down, in case you're a "faffer" like me, and take ages to decide where you want them to go!!
Step 7 of 17
Use your black pen to draw a decorative, wiggly frame, around the card.
Step 8 of 17
Adhere this on to the black card (6 3/4 x 4 1/2").
Step 9 of 17
Adhere this centrally, on to your stencilled background.
Step 10 of 17
Use a little glue to adhere the white die cut tag, on top of the black die cut tag, leaving a slight drop shadow, as shown here.
Step 11 of 17
Adhere the tag to the top, left of your card, with a little glue at the top only, allowing the tag to hang "loose".
Step 12 of 17
Adhere one of the washi die cut heart elements, top centre of the tag.
Step 13 of 17
Use your black pen to draw a decorative, wiggly frame, around the tag.
Step 14 of 17
Adhere more of the washi floral elements, behind your layout, so they lay over the bottom, and side edges of the tag, as shown here.
Step 15 of 17
Adhere the washi die cut bird house, foliage, and bird, on to the tag, tucked just behind your layout, as shown here.
Step 16 of 17
Adhere one of the washi die cut sentiments, across the bottom right of your 3D display.
Step 17 of 17
To finish, adhere your sequins, on, around, and just peeping out, of your 3D artwork.
You made it!
Share your make with the Stamps By Me community - and keep this guide for next time.
Hello! I'm Toni's AI craft helper - I know the projects from Toni's shows, our guides and everything in the shop. Ask me anything, like "which dies go with this stamp set?" or "what do I need to start ink blending?"
An AI helper (not Toni herself), answering from Toni's shows and our shop - please check the product page before you buy.