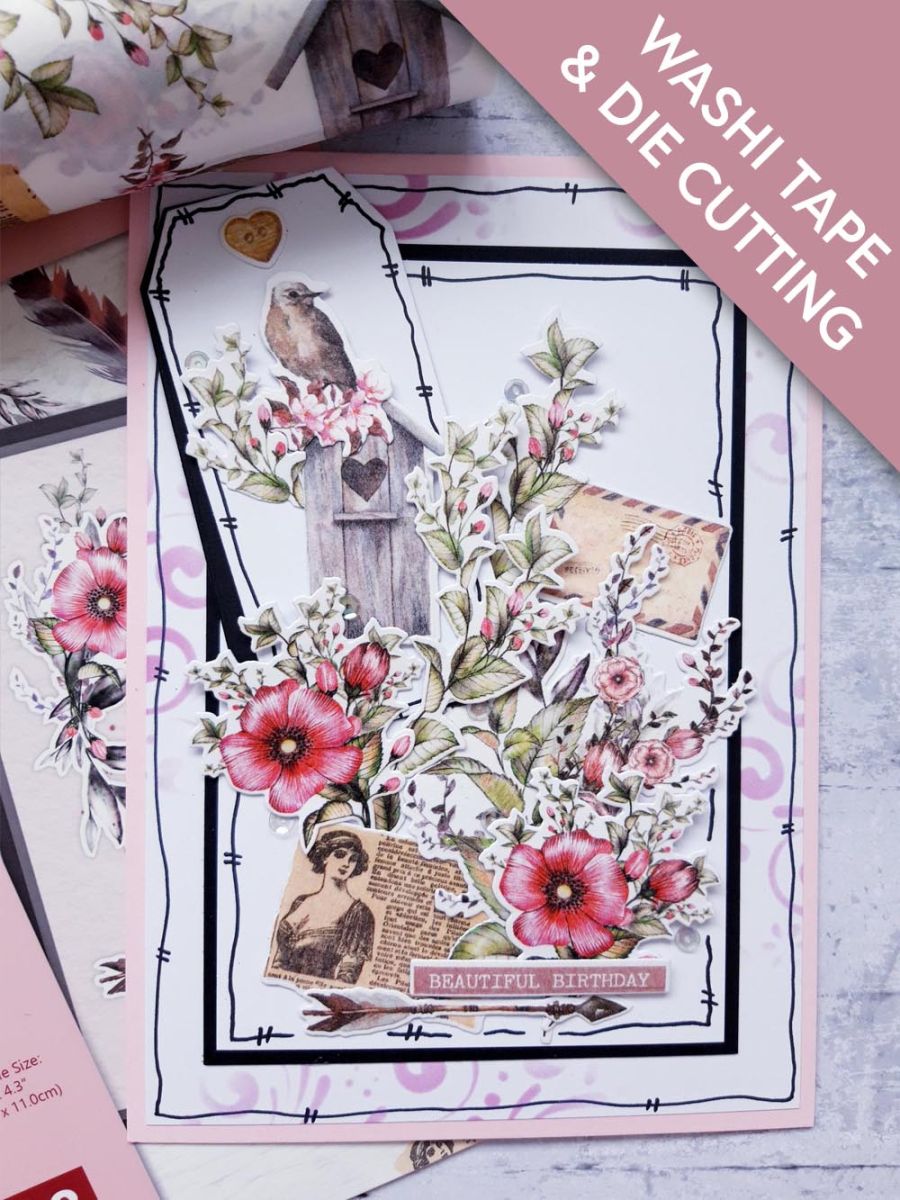
Beautiful Birthday Washi Tape Roll and Die Collection
Outil de préhension pour strass et outil pointu
Massicot
Colle Perfect Together
Ruban adhésif repositionnable
Pastilles mousse 3D
Machine de découpe
Cochez ce que vous avez - cet appareil s’en souvient.
Étape par étape
touchez une image pour l’agrandir · touchez TERMINÉ au fur et à mesure - cet appareil s’en souvient
Étape 1 sur 17
Using the 2 dies as a guide, cut a full "drop" from the Beautiful Birthday washi tape roll.
Peel off a corner of the adhesive backing, then carefully roll it out as you stick it down on to the A4 white card. Once you are happy, you can "buff" it, to adhere it to the card permanently.
Étape 2 sur 17
Line up one of the dies on to the the washi tape, and hold in place with low tack tape.
Run it through your die cutting machine.
Place the second die in place, and die cut the rest of the washi.
Pop all your die cut, washi elements, to one side.
Étape 3 sur 17
Blend the pink Izink Pigment ink, through your chosen stencil, around the edges of the white card (7 3/4 x 5 1/4").
As this is a slow drying ink, dry it off with a heat tool to avoid any smudges!
Étape 4 sur 17
Once dry, adhere your stencilled background on to your pink, top folding, card blank.
Use a black pen to draw a decorative, wiggly frame, around it.
Set to one side.
Étape 5 sur 17
Using the tag die that measures approx 4 1/2 x 2 1/4", from the Thirsty Brush UnLtd Tagged Die Collection, cut out TWO tags. One from the white card and one from the black card (6 x 3 1/2").
Étape 6 sur 17
Use some of your die cut washi elements, to create a 3D display, in the bottom, right hand corner of the white card (6 1/2 x 4 1/4"). You can use both wet glue, and foam pads, to create depth and dimension to your layout.
Tip: Place all your die cut elements in place, BEFORE adhereing them down, in case you're a "faffer" like me, and take ages to decide where you want them to go!!
Étape 7 sur 17
Use your black pen to draw a decorative, wiggly frame, around the card.
Étape 8 sur 17
Adhere this on to the black card (6 3/4 x 4 1/2").
Étape 9 sur 17
Adhere this centrally, on to your stencilled background.
Étape 10 sur 17
Use a little glue to adhere the white die cut tag, on top of the black die cut tag, leaving a slight drop shadow, as shown here.
Étape 11 sur 17
Adhere the tag to the top, left of your card, with a little glue at the top only, allowing the tag to hang "loose".
Étape 12 sur 17
Adhere one of the washi die cut heart elements, top centre of the tag.
Étape 13 sur 17
Use your black pen to draw a decorative, wiggly frame, around the tag.
Étape 14 sur 17
Adhere more of the washi floral elements, behind your layout, so they lay over the bottom, and side edges of the tag, as shown here.
Étape 15 sur 17
Adhere the washi die cut bird house, foliage, and bird, on to the tag, tucked just behind your layout, as shown here.
Étape 16 sur 17
Adhere one of the washi die cut sentiments, across the bottom right of your 3D display.
Étape 17 sur 17
To finish, adhere your sequins, on, around, and just peeping out, of your 3D artwork.
Bravo, c’est fait !
Partagez votre création avec la communauté Stamps By Me - et gardez ce tutoriel pour la prochaine fois.
Demandez à Toni L'assistante créative IA de ToniTAILLE
Bonjour ! Je suis l'assistante créative IA de Toni : je connais les projets des émissions de Toni, nos tutoriels et tout ce qui se trouve dans la boutique. Posez-moi toutes vos questions, par exemple « Quelles matrices de découpe vont avec ce set de tampons ? » ou « De quoi ai-je besoin pour débuter le mélange d'encres ? »
Un assistant IA (et non Toni en personne), qui répond à partir des émissions de Toni et de notre boutique – merci de vérifier la fiche produit avant d'acheter.