Cochez ce que vous avez - cet appareil s’en souvient.
Étape par étape
touchez une image pour l’agrandir · touchez TERMINÉ au fur et à mesure - cet appareil s’en souvient
Étape 1 sur 11
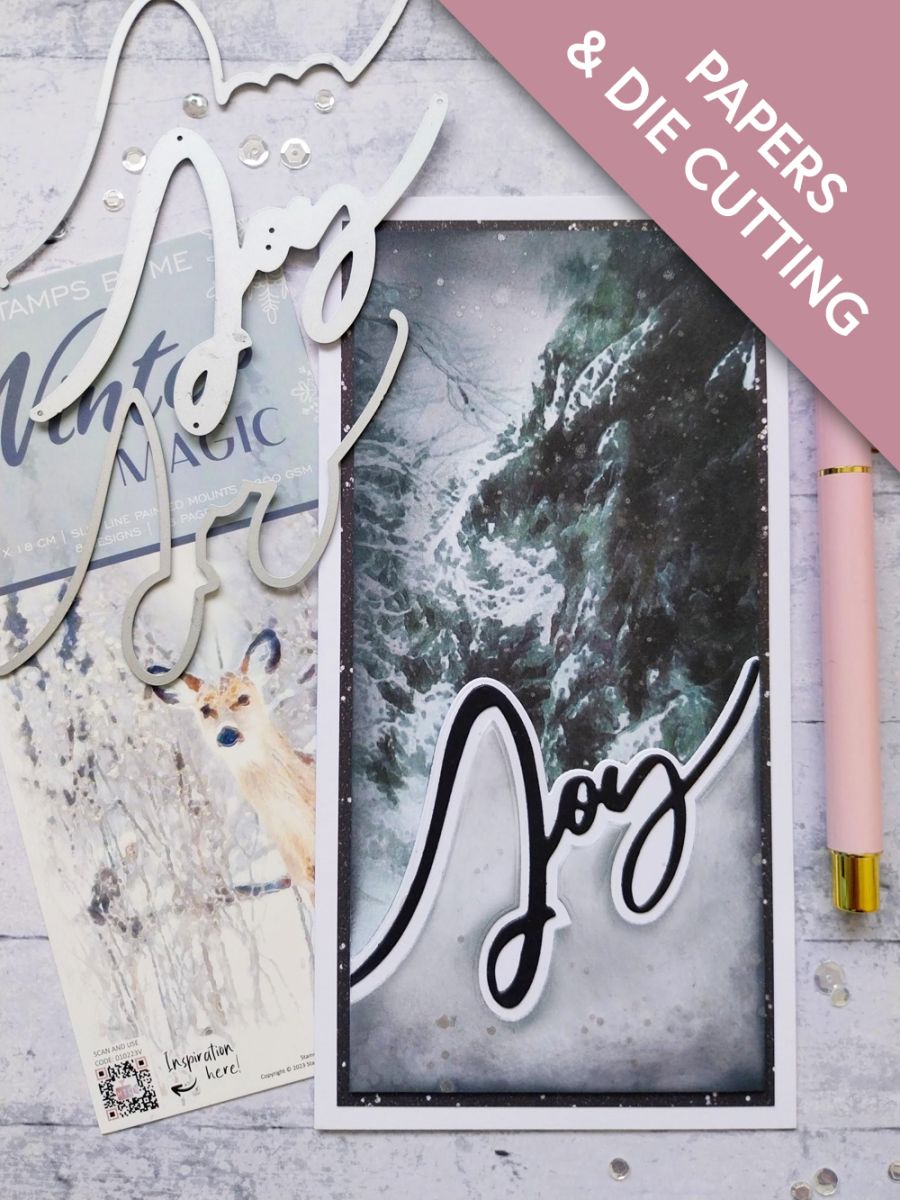
Remove your chosen painted mount from the Winter Magic Slim Line pack. Trim a piece of card the same width as the mount, place the die that cuts the TOP of the word Joy, towards the top of the card and run it through your machine. Now decide how far up the painted mount you wish your snow drift word to sit and trim to the required length.
Alternatievly you can make the card bigger than required and trim everything to size, once you have completed the snow drift element. Try both ways and see which you prefer.
Étape 2 sur 11
Die cut the word "Joy" from black card. If you wish to have a more prominent, substantial sentiment, then die cut it 3/4 times and adhere together.
Étape 3 sur 11
Adhere your die cut word in place, as seen here.
Étape 4 sur 11
Cut another piece of white card the same width as before and place the die, that cuts underneath the word "Joy", across the top and run through your machine.
Étape 5 sur 11
Blend the Lost Shadow Oxide along the top of the snow drift.
Étape 6 sur 11
Adhere the inked snow drift element in place, underneath the die cut "Joy".
Adhere to your painted mount and trim to size, as required.
Étape 7 sur 11
Use your blending tool to apply Black Soot around the edges of your painted mount and snow drift element, drawing everything together.
Étape 8 sur 11
Swirl the Pearlywinks Pearl Mist spray, to activate the mica and spray on to your glass mat. Use a paint brush to splatter on to your artwork, before drying it with a heat tool.
Étape 9 sur 11
Trim this decorative sheet, from the Charcoal All Surfaces pack, 1/4" bigger than your painted mount.
Étape 10 sur 11
Adhere your mount on to the decorative paper.
Étape 11 sur 11
Adhere to your card blank, to complete your snow drift project.
Bravo, c’est fait !
Partagez votre création avec la communauté Stamps By Me - et gardez ce tutoriel pour la prochaine fois.
Demandez à Toni L'assistante créative IA de ToniTAILLE
Bonjour ! Je suis l'assistante créative IA de Toni : je connais les projets des émissions de Toni, nos tutoriels et tout ce qui se trouve dans la boutique. Posez-moi toutes vos questions, par exemple « Quelles matrices de découpe vont avec ce set de tampons ? » ou « De quoi ai-je besoin pour débuter le mélange d'encres ? »
Un assistant IA (et non Toni en personne), qui répond à partir des émissions de Toni et de notre boutique – merci de vérifier la fiche produit avant d'acheter.