Cochez ce que vous avez - cet appareil s’en souvient.
Étape par étape
touchez une image pour l’agrandir · touchez TERMINÉ au fur et à mesure - cet appareil s’en souvient
Étape 1 sur 10
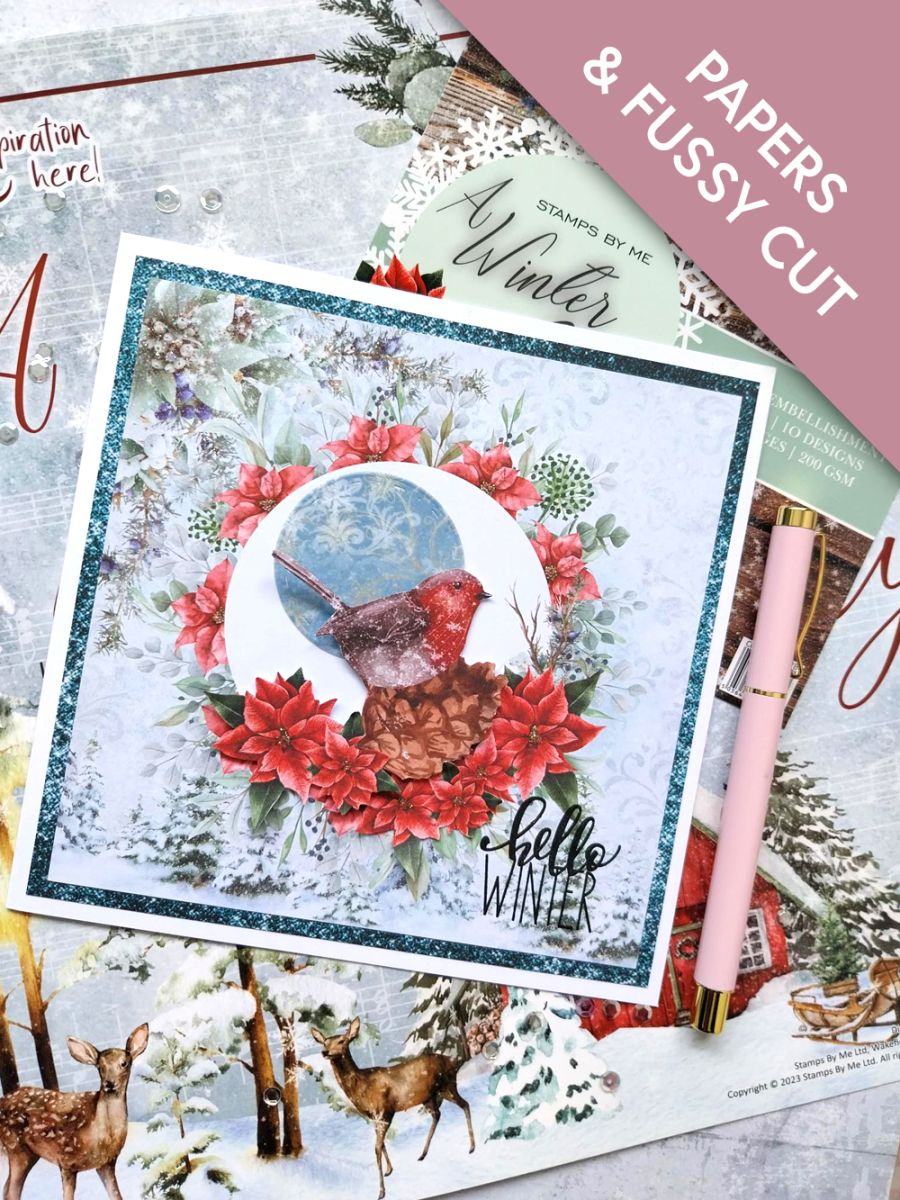
Remove this beautiful floral frame paper from the Winter Story 6 x 6" Embellishment pack. If you are using a smaller card blank, then trim down to size, as required.
NB: You can use smaller card blanks and for our USA crafters, you can adapt your exclusive HSN collection, as necessary, to fit the sizes you are working with.
Étape 2 sur 10
Fussy cut the Robin and a variety of floral elements, from this sheet found in the Embellishment pack.
Étape 3 sur 10
Use a 2" circle die to create a "Moon" from one of the elegant vellum sheets, in the Winter Story Vellum Pack.
Étape 4 sur 10
Mould and shape your cut-out elements with your fingers, before adhering around the bottom right of your floral frame. Use a combination of wet glue and foam pads, to create depth and dimension to your 3D layout.
NB: Leave the top of the Robin free from glue, so you can slide the "Moon" behind it.
Étape 5 sur 10
Using your tape runner, secure the vellum "Moon" behind, so the Robin emerges from the floral display, against the backdrop of the Moon.
Étape 6 sur 10
Trim this gorgeous teal paper, from the All Surfaces Paper Pack, to 6 1/4" square (if you're working on a smaller card, then trim 1/4" bigger than the size of your floral wreath paper).
Étape 7 sur 10
Adhere your artwork on to the teal background paper.
Étape 8 sur 10
Stamp your chosen sentiment with the Midnight ink, in the bottom right corner of your artwork.
Étape 9 sur 10
Adhere your artwork on to the front of your white card blank.
Étape 10 sur 10
To complete your project, add a touch of festive sparkle, where required, using the Ranger Stickles.
Bravo, c’est fait !
Partagez votre création avec la communauté Stamps By Me - et gardez ce tutoriel pour la prochaine fois.
Demandez à Toni L'assistante créative IA de ToniTAILLE
Bonjour ! Je suis l'assistante créative IA de Toni : je connais les projets des émissions de Toni, nos tutoriels et tout ce qui se trouve dans la boutique. Posez-moi toutes vos questions, par exemple « Quelles matrices de découpe vont avec ce set de tampons ? » ou « De quoi ai-je besoin pour débuter le mélange d'encres ? »
Un assistant IA (et non Toni en personne), qui répond à partir des émissions de Toni et de notre boutique – merci de vérifier la fiche produit avant d'acheter.