Étape 1 sur 14
Place the sheet of A4 white card in landscape view and use your score board and bone folder to score on the long side, at 10cm and 20cm, thus dividing the card in to 3 equal panels.








 Deal Huntersmar. 10 nov. 14 h 00
 Hidden Gemsmer. 11 nov. 10 h 00
 The Thursday Dropjeu. 12 nov. 18 h 00
Les prix sont mis à jour immédiatement. Chaque langue est notre propre traduction, pas Google.
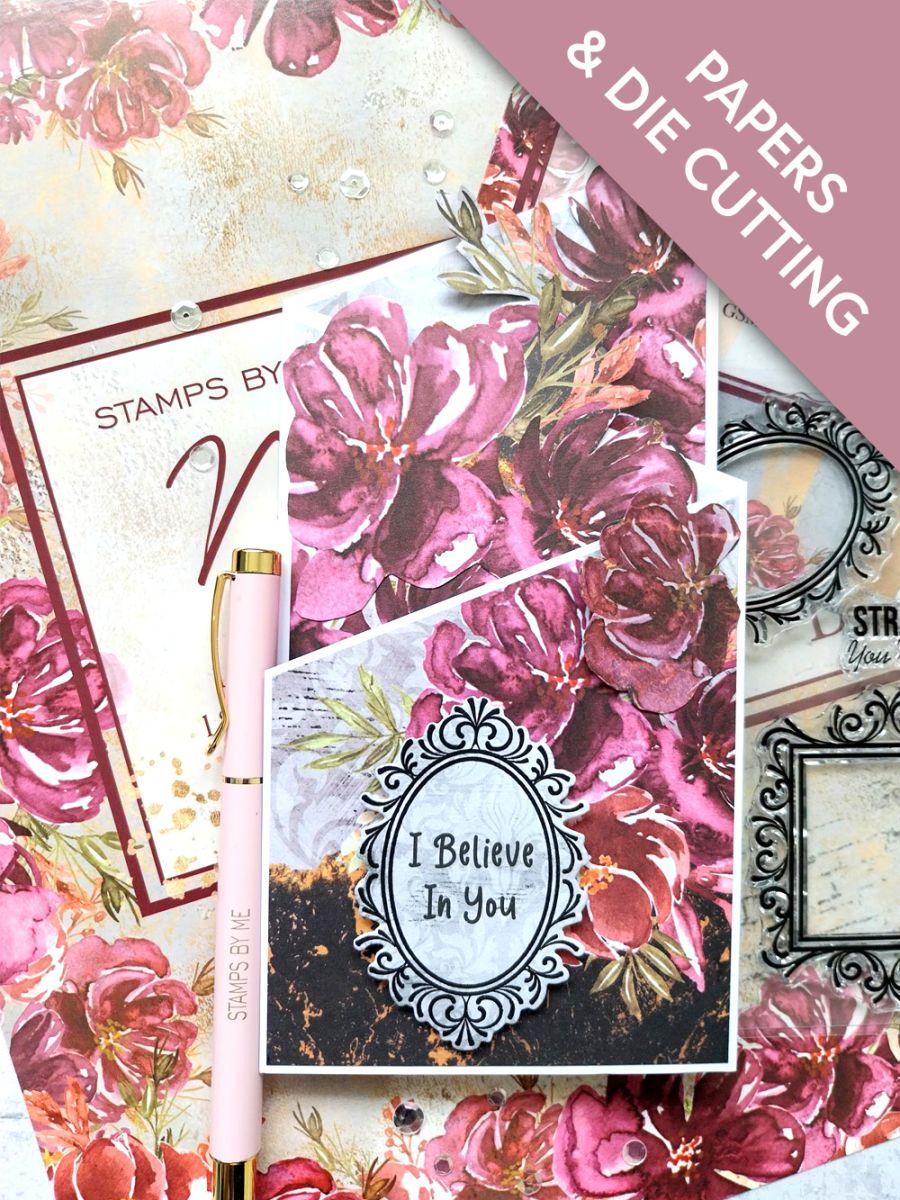
Place the sheet of A4 white card in landscape view and use your score board and bone folder to score on the long side, at 10cm and 20cm, thus dividing the card in to 3 equal panels.
Mark 8cm up from the bottom left side and cut diagonally, to the top right corner, as seen here.
NB: You can change where you start your diagonal cut, on the left side edge, as required.
Fold and burnish the score lines, to create your tri-fold card blank.
Remove this beautiful decorative paper, from the 12 x 12" Mulberry & Gold Damask paper pack.
Using your tri-fold card blank as a guide, use a pencil to measure, mark and cut 3 panels from the paper, each slightly smaller than the front facing panels, as seen here.
Adhere the paper panels to your card blank, then pop your card to one side.
Fussy cut a selection of floral elements, from your Mulberry & Gold Damask Collection.
Adhere one on the inner card panel, as required, allowing some of the leaves or petals to peek over the top of the card.
Adhere a couple to the centre, inner panel, again allowing some to overhang.
Finally, adhere several to the front panel, ensuring that some elements peek above the angled top of the panel. You can use a combination of wet glue and foam pads, for extra dimension.
When your tri-fold card is folded together, you can decide if you want to add any more elements.
Ink and stamp the oval frame, in Midnight, around the "I Believe In You" sentiment, in the coordinating sentiment pack.
Use the coordinating die to cut it out.
Adhere to the front of your card, with foam pads, to finish.
Partagez votre création avec la communauté Stamps By Me - et gardez ce tutoriel pour la prochaine fois.
Vous préférez l’ancienne présentation ? Ouvrir l’ancienne page.



