Cochez ce que vous avez - cet appareil s’en souvient.
Étape par étape
touchez une image pour l’agrandir · touchez TERMINÉ au fur et à mesure - cet appareil s’en souvient
Étape 1 sur 11
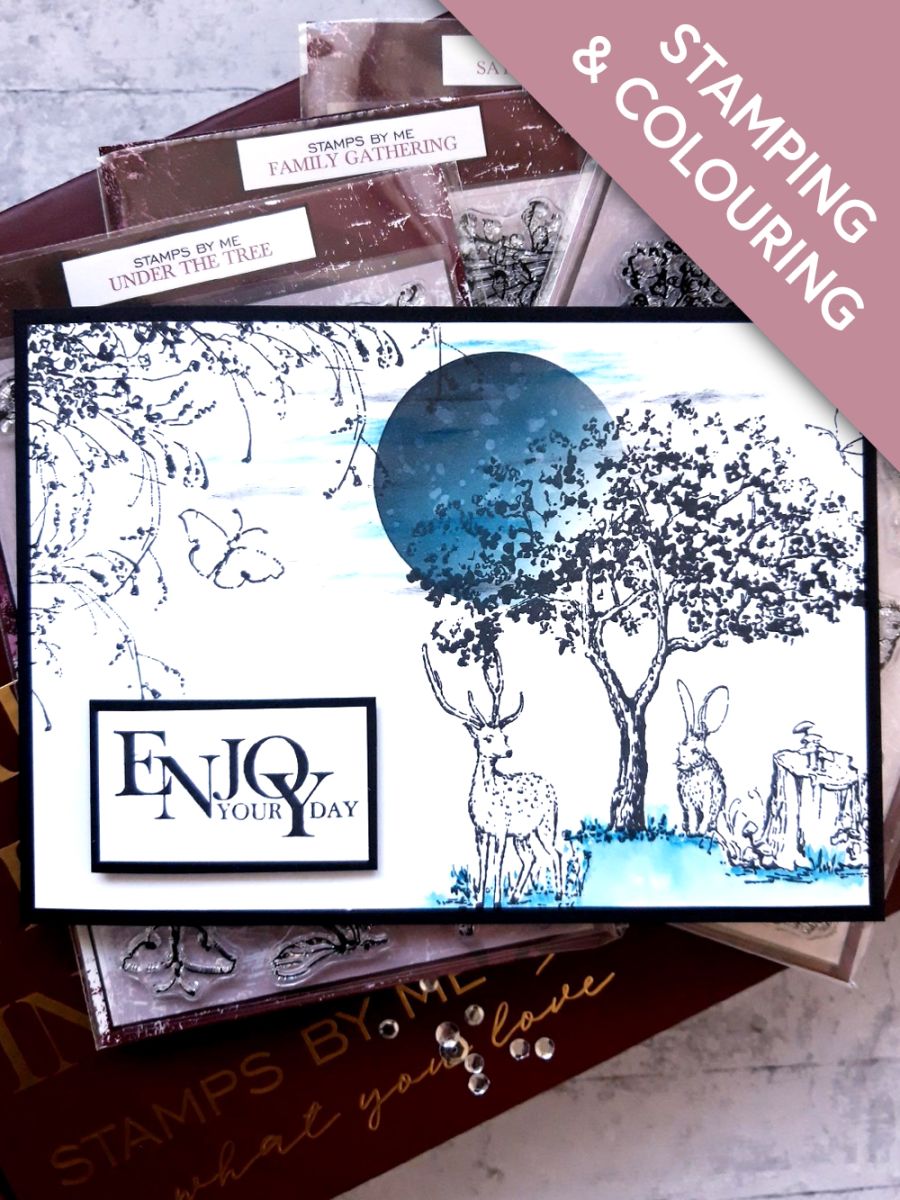
Position your circle stencil top centre of the white card, placed in landscape view. Use your tree stamp as a guide, as you want the tree to overlap the Moon, but go off the right hand edge of the card.
Use your blending tool to blend the Tiffany dye ink within the circle stencil, fading it out as you move towards the bottom right.
Blend with the Black Soot Distress Ink, to make the colour more intense and create shadow, around the top left of the Moon.
Étape 2 sur 11
Use a paint brush to splatter water on to the ink, wait a few seconds then mop up the excess with a paper towel.
Étape 3 sur 11
Remove the stencil and, using the edge of your blending tool, drag the Tiffany and Black Soot across your Moon, thus creating wispy clouds.
Étape 4 sur 11
Once the ink is dry, ink this gorgeous tree stamp, from Under The Tree, with the hybrid Midnight and stamp just off the right hand edge of the card.
Étape 5 sur 11
Ink up the large floral stamp, from Say It With Love, with the Midnight ink and stamp coming down from the top left corner of your card.
Étape 6 sur 11
Ink up the Stag, Hare and tree trunk stamps, from your Pretty Things Inside stamp sets, with Midnight, then stamp them below the tree, thus creating your beautiful scene.
Étape 7 sur 11
Ink up one of the Butterfly stamps, from Under The Tree and stamp amongst the hanging foliage.
Étape 8 sur 11
Ink up another and stamp it flying in, from the top right of your scene.
Pop a little of the Tiffany on to your glass mat and add water. Using a paint brush, blend it below the tree and animals, to ground your artwork.
Set aside to dry.
Étape 9 sur 11
Use the Midnight to ink your sentiment stamp from Love & Hope and stamp on to white card. Trim, adhere to black card, then trim that to create your mat.
Étape 10 sur 11
Adhere your sentiment, with foam pads, to the bottom left of your artwork.
Étape 11 sur 11
Finish by adhereing this on to your black, landscape card blank.
Bravo, c’est fait !
Partagez votre création avec la communauté Stamps By Me - et gardez ce tutoriel pour la prochaine fois.
Demandez à Toni L'assistante créative IA de ToniTAILLE
Bonjour ! Je suis l'assistante créative IA de Toni : je connais les projets des émissions de Toni, nos tutoriels et tout ce qui se trouve dans la boutique. Posez-moi toutes vos questions, par exemple « Quelles matrices de découpe vont avec ce set de tampons ? » ou « De quoi ai-je besoin pour débuter le mélange d'encres ? »
Un assistant IA (et non Toni en personne), qui répond à partir des émissions de Toni et de notre boutique – merci de vérifier la fiche produit avant d'acheter.