Cochez ce que vous avez - cet appareil s’en souvient.
Étape par étape
touchez une image pour l’agrandir · touchez TERMINÉ au fur et à mesure - cet appareil s’en souvient
Étape 1 sur 11
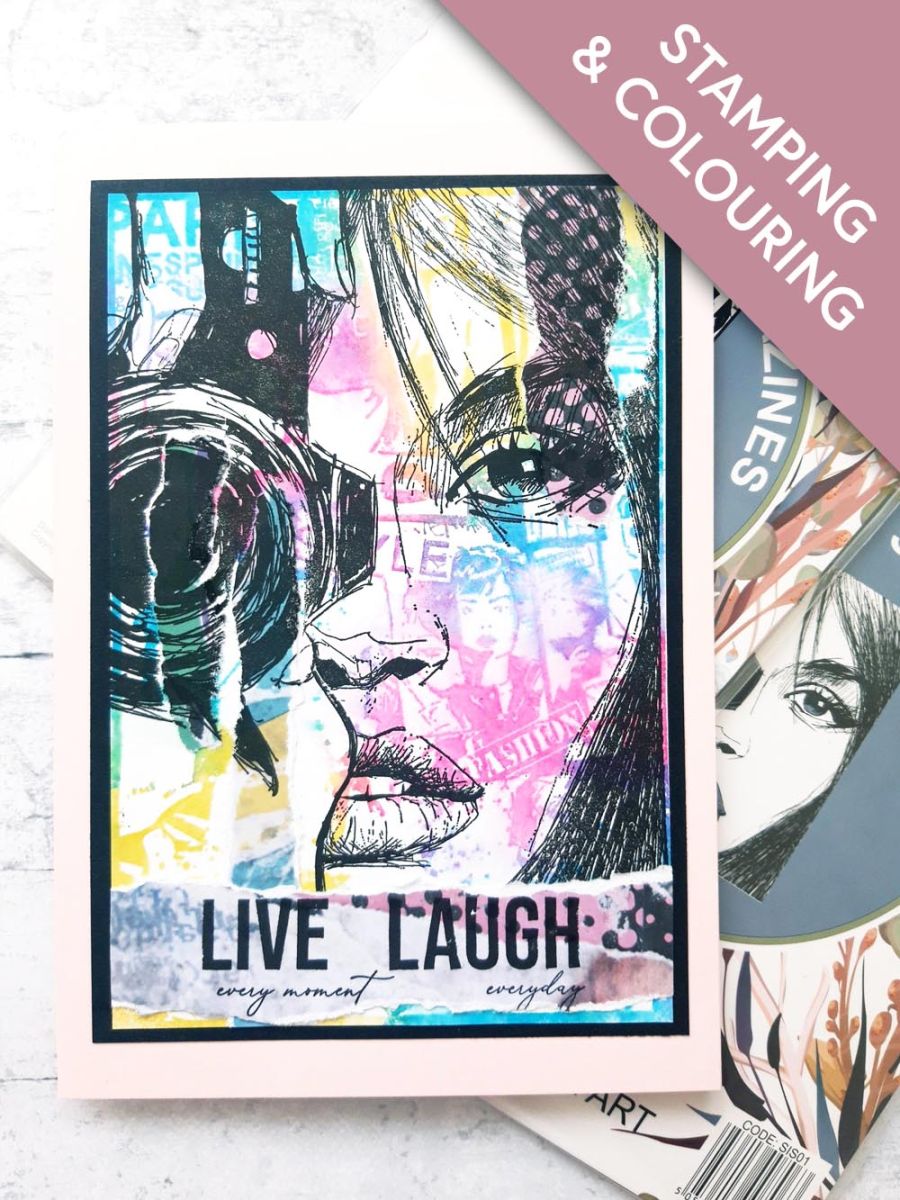
Ink up the Magazines stamp randomly, with the Izink Dye ink pads. Spritz the stamp with water and stamp on to the white card (7 x 5").
You can reink and stamp again, to intensify the vibrancy of the colours. You can also spritz your stamped image, allowing it to "bleed", before drying it with a heat gun.
Étape 2 sur 11
Trim off the excess white card around your stamped image.
Étape 3 sur 11
Tear out this decorative sheet, from the Imala Collage Collection paper pad.
Étape 4 sur 11
Randomly tear strips from the paper, as seen here.
Set this decorative sheet to one side, as you will need it in a later step.
Étape 5 sur 11
Adhere them coming up, from the bottom left and down, from the top right, of your stamped background.
Étape 6 sur 11
Ink up the stamp from Imala Snapshot, with the Onyx Black Versafine and stamp on to your background. You can reink and stamp again, if you want to get a clearly defined image, but I preferred the distressed look.
Étape 7 sur 11
Tear another strip from the decorative sheet, set aside earlier.
NB: It must be the same width as your stamped background, and deep enough to stamp the sentiment on to.
Étape 8 sur 11
Ink up the sentiment, as shown here, with the Versafine and stamp in the centre of the torn strip.
Étape 9 sur 11
Adhere it just up from the bottom, of your stamped background.
Étape 10 sur 11
Adhere on to the black card.
Étape 11 sur 11
Ahere on to the front of your pink, top folding card blank.
Bravo, c’est fait !
Partagez votre création avec la communauté Stamps By Me - et gardez ce tutoriel pour la prochaine fois.
Demandez à Toni L'assistante créative IA de ToniTAILLE
Bonjour ! Je suis l'assistante créative IA de Toni : je connais les projets des émissions de Toni, nos tutoriels et tout ce qui se trouve dans la boutique. Posez-moi toutes vos questions, par exemple « Quelles matrices de découpe vont avec ce set de tampons ? » ou « De quoi ai-je besoin pour débuter le mélange d'encres ? »
Un assistant IA (et non Toni en personne), qui répond à partir des émissions de Toni et de notre boutique – merci de vérifier la fiche produit avant d'acheter.