Étape 1 sur 10
Spray the Izink Butterscotch on to your craft or glass mat, and add a little water.
Smoosh the white card in to the ink. You can add more colour, to achieve your desired effect.








 Deal Huntersmar. 10 nov. 14 h 00
 Hidden Gemsmer. 11 nov. 10 h 00
 The Thursday Dropjeu. 12 nov. 18 h 00
Les prix sont mis à jour immédiatement. Chaque langue est notre propre traduction, pas Google.
Spray the Izink Butterscotch on to your craft or glass mat, and add a little water.
Smoosh the white card in to the ink. You can add more colour, to achieve your desired effect.
Spray the Izink Underwater on to your mat, spritzing with water as before.
Pick up the ink on to the card. You can add more of both sprays, until you are happy with your background.
Dry off the ink naturally, or with your heat gun.
Ink up the detailed stamp, from Live Your Story Lamination Stamp Collection, with the Onyx Black Versafine.
Stamp it centrally, on to your inky background.
Dry off the ink thoroughly, before proceeding to the next step.
Using a paint brush and water, you need to paint the stamped image, with the water, giving the water a few seconds to work. Then "lift" the ink off, with a paper towel. This is referred to as "Faux Bleaching". Repeat this process until you are happy with the result.
Tip:Instead of water, you can use diluted bleach to "lift" out the ink. This technique gives a more bold and striking effect, whereas the water technique gives a more subtle result. The choice is yours.
Spray the Izink Underwater on to your mat. Add a little water.
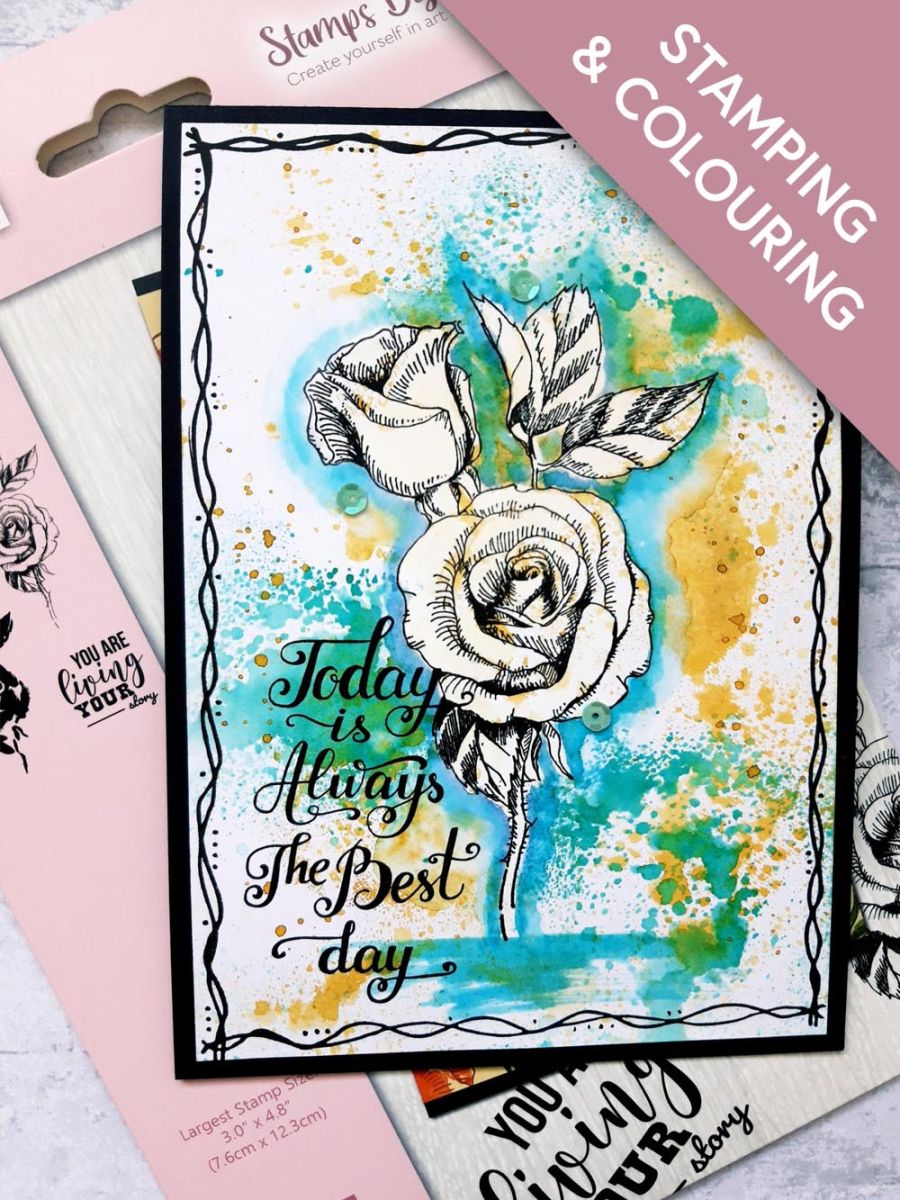
Use a paintbrush to "ground" the Rose, and paint a "Halo" around your image. The Halo can be as subtle, or as bold as you want. In my head I was going for a subtle Halo, but i actually ended up creating a bold, striking one, which is totally out of my comfort zone....but I love the effect!!
Add a few random splats of the Underwater spray, on to your artwork.
Add the Izink Butterscotch spray on to your mat, adding a little water.
Splatter your artwork, as required. I LOVE splats, so really went for it !!
Allow your artwork to dry thoroughly, or speed it up with a heat gun, if you're impatient...like me!
Ink up the sentiment stamp with the Onyx Black Versafine, and stamp in the bottom left corner, of your artwork.
Ink up the biggest frame stamp, from the Dot Frame Stamp Collection, with the Versafine, and stamp it around your artwork.
Adhere your artwork on to the front of your top folding, black card blank.
To finish, add sequins on, and around, your artwork.
Partagez votre création avec la communauté Stamps By Me - et gardez ce tutoriel pour la prochaine fois.
Vous préférez l’ancienne présentation ? Ouvrir l’ancienne page.



