Outil de pose de strass et outil pointu (Gem pick up and Pokey Tool)
Ciseaux
Colle Perfect Together
Cochez ce que vous avez - cet appareil s’en souvient.
Étape par étape
touchez une image pour l’agrandir · touchez TERMINÉ au fur et à mesure - cet appareil s’en souvient
Étape 1 sur 17
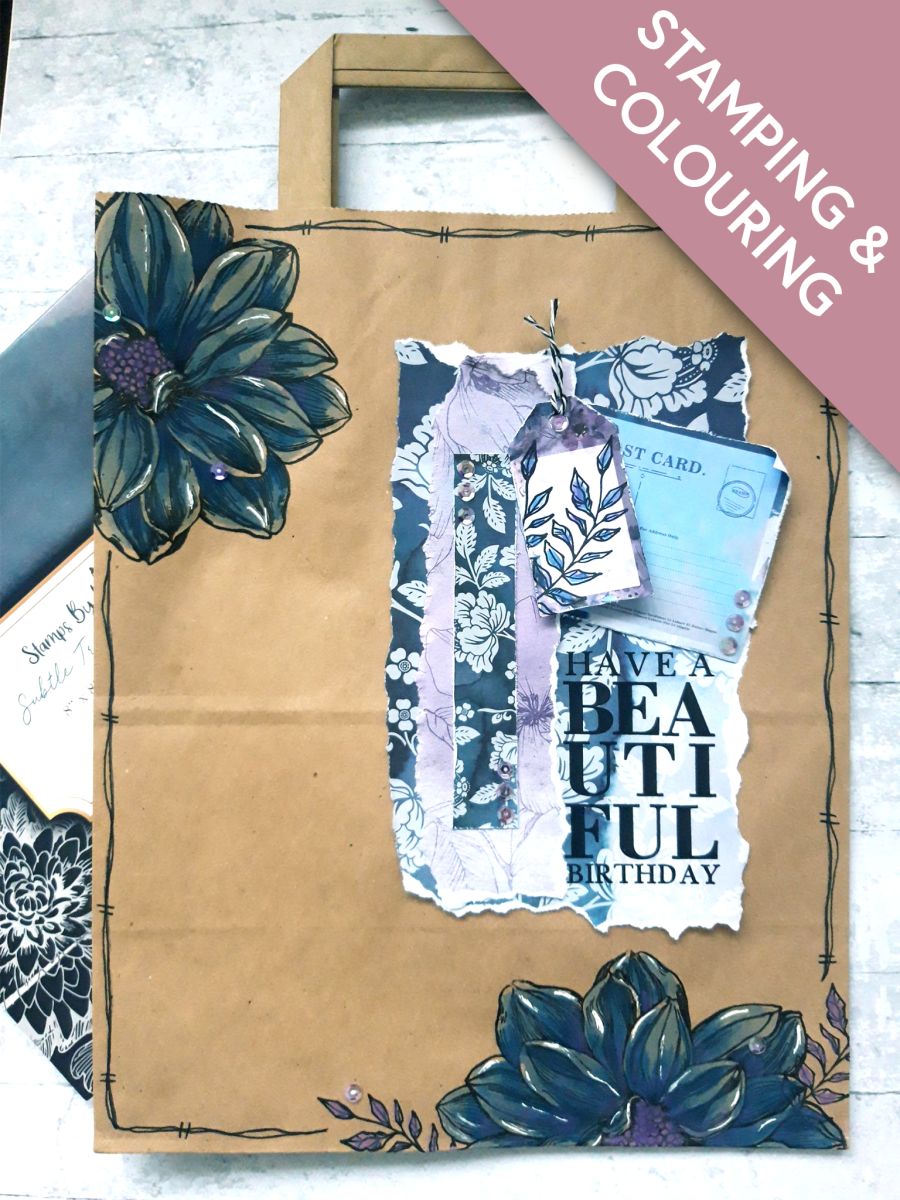
Place your gift bag inside your Eureka 101, positioned so you can stamp on the top left corner. It doesnt affect the stamping capability if you allow the bag to hang outside of the stamping area.
Tip: I place a piece of card inside the bag, to give me a smoother, firmer base on which to stamp.
Ink up the stamp from the Beautiful Birthday Stamp Collection, with the Onyx Black Versafine.
Stamp off the top left corner of your gift bag.
Étape 2 sur 17
Move your gift bag up, in your Eureka 101, so you can stamp on the bottom.
Ink up the same stamp again, with the Versafine, and stamp it coming up from the bottom right hand edge of your kraft bag.
Keep the card inside the bag, and dry off the Versafine before proceeding to the next step.
Étape 3 sur 17
Apply some of the Izink Pigments on to your craft or glass mat.
Add some water and use a paint brush to paint your stamped images.
Étape 4 sur 17
Once all the ink is completely dry, use a white gel pen to add accents and highlights to the stamped images.
Étape 5 sur 17
Use a black pen to draw a decorative frame around your gift bag.
Étape 6 sur 17
Choose 2 coordinating papers from the Subtle Tranquility 8 x 8" paper pad.
Tear one in to a strip 7 1/4 x 4 1/2" and the other to 7 x 1 3/4".
Étape 7 sur 17
Also from the pad cut out one of the border strips, a tag and a postcard.
Roughen up the edges using the side of your scissors
Étape 8 sur 17
Ink up the sentiment stamp, from the Beautiful Birthday stamp set, with the Onyx Black Versafine.
Stamp in the bottom right corner of your largest piece of torn paper.
Étape 9 sur 17
Once the sentiment is dry, adhere this on to the front, top right hand side, of your stamped gift bag.
Étape 10 sur 17
Adhere the other strip of paper, with the Postcard tucked underneath, as shown here.
Étape 11 sur 17
Adhere the cut out border paper on top of your paper elements, as shown.
Étape 12 sur 17
Ink up the foliage stamp, from the Beautiful Birthday Stamp Collection, with the Versafine, and stamp on to the tag that you cut out earlier.
Add a little of the Izink Pigments on to your craft or glass mat, add a little water and use your paint brush to colour the foliage in.
Use a hole punch to create a hole in the top of your tag.
Étape 13 sur 17
Tie Bakers Twine through the punched hole.
Étape 14 sur 17
Adhere the tag in place, on top of your decorative paper elements, as shown here.
Étape 15 sur 17
Add sequins on, around and tucked under, your decorative paper elements.
Étape 16 sur 17
Add sequins around the floral stamped image, at the bottom of your gift bag.
Étape 17 sur 17
Add sequins to the floral element, top left of your bag.
Bravo, c’est fait !
Partagez votre création avec la communauté Stamps By Me - et gardez ce tutoriel pour la prochaine fois.
Demandez à Toni L'assistante créative IA de ToniTAILLE
Bonjour ! Je suis l'assistante créative IA de Toni : je connais les projets des émissions de Toni, nos tutoriels et tout ce qui se trouve dans la boutique. Posez-moi toutes vos questions, par exemple « Quelles matrices de découpe vont avec ce set de tampons ? » ou « De quoi ai-je besoin pour débuter le mélange d'encres ? »
Un assistant IA (et non Toni en personne), qui répond à partir des émissions de Toni et de notre boutique – merci de vérifier la fiche produit avant d'acheter.