37:00 Good
40:00 morning. It is our Hidden Gems show today, guys. How are you all? Are you good? I'm tired today, guys. We've had a real busy week. A viewer's been on training courses. We've had TV. So we're just going to chill the beans today. I hope everyone is well. I will look at the comments shortly. But if you are brand new here, welcome to the channel, everyone.
40:30 My name is Toni, and this is the home of Stamps By Me, the How to Craft Network Studios, and we do appreciate you coming. Time in, time out, every day. Everything free. So, if you are watching, the Hidden Gems show is little bits and pieces that I've stolen from the warehouse and are playing with. I've still got some of the lovely Tim Holtz papers that I had the last show, but we're going to do something a little bit different now. Now, the shows are to showcase possibly new product,
41:00 some different product, variations of product, so you can get a flavor of all of the things that we supply here at Stamps By Me. So we have over 30,000 products on our website, 120 brands, and you can see all of the lovely products that they all use. It's not all about Stamps By Me all the time. And I'm really enjoying doing the Hidden Gems, and I really enjoy using other branded products as well because I love my own products, but isn't it nice to have a touch into somebody else's products and be creative
41:30 that way as well? So we've got a viewer on, everyone. If you can share the shows, that would be awesome. As always, we are trying to go live and fill that schedule as often as we can without burning the whole thing. So, let's have a look. Now, a couple of things I just need to touch on real quick. If you're on the retreat, if you're in the Create Together club, updates on those are going into the back of your accounts this week, if not today.
42:00 Just keep an eye on your account. And as always, I would probably get into the habit, if you are a Stamps By Me follower and are purchasing, watching all of my shows, waiting for launches. If you are that hardcore Stamps By Me follower, you need to check your account every single day. There are things happening every day. You have a deal of the day in your back of your account every single day. If I've got something to tell you and it's really important, I'll put it in the back of your account. I'm not putting anything on social media because
42:30 half of the stuff that I put out don't apply to everyone. So it's just easier for you to check your back of account. If you're thinking to yourself, "Oh, I made an order on Monday, and it's now Wednesday. I haven't had a dispatch notice. What's going on?" Check your back of your account before you go on social media and go, "Any updates?" Because we've got into-- And that's not your fault, by the way. That's mine. Because I've said to you, "Get in the group, chat, ask the questions," and things like that. You do not need to ask questions about your account, guys.
43:00 It's all in your account. And if you're in the back of your account and you're still thinking, "I feel like there is a chance I'm missing out here, or something hasn't happened for me. I need to talk to somebody." Then put in the box, "Ask Toni." Type your message in there. Or even better, you can message a viewer as well. But if there are any updates, it will be in the back of your account. I can't make it any clearer. And if you're on our retreat, there's no good ringing the hotel. They can't tell you what you're having for your breakfast because I haven't decided E-TICKET - STAMPS BY ME GOLD MEMBER 2027 - 1 MAY - 31 OCT...
43:30 yet. I can only do that one week before. They have to order the food in, and I can't order anything till a week before, and we're not a week before, it's like just under two. So those sort of things just need to get into the back of your accounts. We send text messages, we send emails, and we put posts in the back of your account. I don't think there's any other company that gives that in all of those manners. And this is not me being critical, it's not me telling you all off. We've got into the habit of doing what we've done.
44:00 But now that we've got our super-duper website and all of the facilities that come in the background, we really need to educate each other. I need to stop going on social media and saying, "Hey, guys, there's no show tonight at 6:00." Because I'm in the habit of doing that too, when actually, if you look at the schedule, you'll see what's happening on there on a day-to-day basis as well. I would like to give a viewer a break from the questions, all of the cumbersome questions as well, and a viewer also. So hopefully, doing those things in the
44:30 back of your accounts is going to help you and guide you. But equally, if you are a little bit of a worrywart, because I know some of you are, there is a facility in the back of office to speak to us too, okay? So make sure you do that as well. So let's have a look. Let's have a look. We've got a viewer on. FOMO. Yeah, they're missing out. Let's have a look. "Because Toni is awesome." What are you like? I'm not awesome today, guys. I'm chilling the beans today, actually.
45:00 A viewer's like, "I've got lots of new stuff to put on your show." I'm like, "Oh, please, not today." Not today, guys. I'm like, I'm just catching up. The school run, all of the good stuff in between. So I said, "Can I just touch on the papers that I had in last week?" He says, "Of course you can." So that's what we're going to do, but I've built in something from Stamps by Me too. So if you have any of the elements, you can get them, you can get the papers. The papers are super-duper price points as well. Don't forget to check your back office on your account. And also in the back of your office on your accounts, 4:00 AM in Dallas
45:30 right now. Oh, I don't know why she's up. Oh, bless your heart. If you check your back office account as well, guys, make sure you check, have you done your loyalty lock-in points there? So that's where you're going to get your best savings. The Creative Edit as well. And I don't think there's much more to talk about on that front. But equally, if there are any updates on anything, because we are fighting fires here at Stamps by Me in the background, I'll put it in the back of your account.
46:00 Still unsure, that way then you can get Toni and she'll guide you on where to go. Okay? We try and hold your hand as much as we can, but sometimes it's not always possible to take you from London to Chicago, LA to New York. I've had a mince pie. Is everyone all right, though? I hope you're all up. So let's have a look at some of the products in the show. First of all, I've grabbed some Stickles real quick that I really love. I told you, didn't I?
46:30 If you get a few of the ones that you really love and the ones that you know you're going to use, get a few. Try them. If you like them, then you can get the other colors because there's lots of colors, right? And I just want to show you one that I've put in my little stash today. It's the copper. Have you seen this one? So you know that I have the iridescent ones and I have all of the goldy ones and things like that. But look at this one, guys. The copper. This is going in my little collection. I don't have a lot, guys. There are tons of different colors. You know me, I don't overconsume.
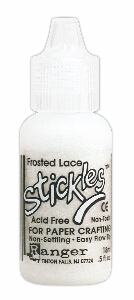
47:00 I hate it. But if I do like a color and think, "I'll definitely use that," I'm getting it. This is the copper one. It's so gorgeous. It's so gorgeous. It's quite punchy with the orange. And then I have the black diamond, which is going to be good for all of our sort of scene setters and sunlit skies and reflections on water. Look at that. And then the other one that-- This one is called the frosted lace, and the one that I use normally is stardust.
47:30 So you can see. Look how different they are. So the stardust has got a silver undertone, great for Christmas. And the one that I have already, which is actually nearly out, is the stardust. So you can see the difference there, guys. So have a look. If you've got a few of ... Love Stickles. Me too. If you've got a couple of the colors and love them, get some of the other colors as well. So these are the new ones in my stash today, the three that I've
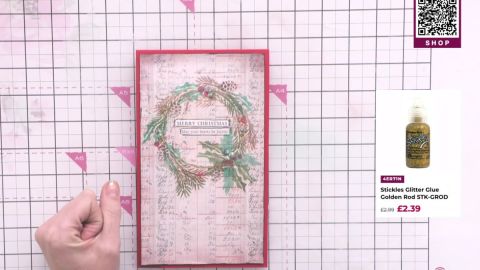
48:00 added. And when I can afford it, I'll get another three. I mean, they're not expensive, right? But I'm on a need-to-go basis right now. Oh, right. So some of the papers that are also in the show as well. Before I get into the papers in the show, though, guys, I do want to just touch on, a lot of you use this, and I forget every single time to talk about it in the background. Every time I'm live, actually, and it's going on all the time in the background. Stickles Glitter Glue Copper Stickles Glitter Glue Black Diamond - STK-BDIA
48:30 Now, if you didn't know this, I'm going to quickly educate you. Do you know that if you recommend a friend, they get 10 pounds and you get 10 pounds for recommending them? And you can do that how many times a month? Is it three? Oh, unlimited now. Okay, so when we did it before, you could do that three times in a month, but now a viewer's saying that that is unlimited. So if you recommend a friend and they purchase something, they get 10 pounds and you get 10 pounds as well, and it gets credited to your account. So can you imagine if you recommended three of your crafty Stickles Glitter Glue Frosted Lace - STK-FRO
49:00 friends from somewhere else? That's 30 pound, guys. So it's sort of like a little bit of a reward to get your account built up so you can get your little Stickles and your little Bruisy bonuses and think, "Oh, that was a little bit worth it. It didn't come out of my own bank. It came out of the Stamps by Me bank." So if you do have any friends that you see on any social media pages or in crafty groups or things like that, you can get that 10 pounds. And if you recommended 10 friends and
49:30 they all bought something, that's 100 quid. It's like I'm giving money away. But I just know that, that reward that you get, I get rewarded because the lovely customer that's purchased from me might come back and buy a second time, and then I've got another lovely new customer. So it's sort of like one feeds the other. So how does that work? If you have a look in the back of your office, it's there. It says "Recommend a friend," and it's also at the bottom of the website as well, which is so cool. And we've got the facility now to just credit your account.
50:00 So if, say, for example, I say, "Hey, such and such, you've just won £10 and it's going to get credited to your account." I can do it like that, or should I say a viewer can do it like that. He's been so excited about it. If you haven't got the messages anymore, I'm trying to put down all the messages. If you haven't got the messages that say, "Hey, I won £10 in the show last week. Can you tell me how I get that £10?" And then a viewer's got to do it for you. No, I can do it immediately, right here, right now, in the show, and give you £10. Not that I'm going to be giving you all things willy-nilly, but I
50:30 think it's great. So it's just sort of like taking the workload off my lovely team, me, particularly a viewer, who spends her life on social media trying to help everybody out, and then a viewer in the back of office having to spend two hours on a morning going through questions and helping people with inspiration, because the inspiration is there. We shouldn't really be needing to help you out with that any longer. So hope that's okay. My name is Toni Derrick, if you're wondering there. I am the presenter today. I have this jumper on, which,
51:00 by the way, is my son's. A viewer's laughing. I bought my son this and a viewer, and I saw it today, and a viewer's worn his, but a viewer hasn't worn his. I thought, "Do you know what? If son and father aren't going to co-ord, mom and dad are." So I was like, "I'm putting this on today." Have you seen how big it is? You can see how big my boy's getting, can't you guys? So let's have a look at the papers. But again, there's just so much to talk about, so much good stuff that you really
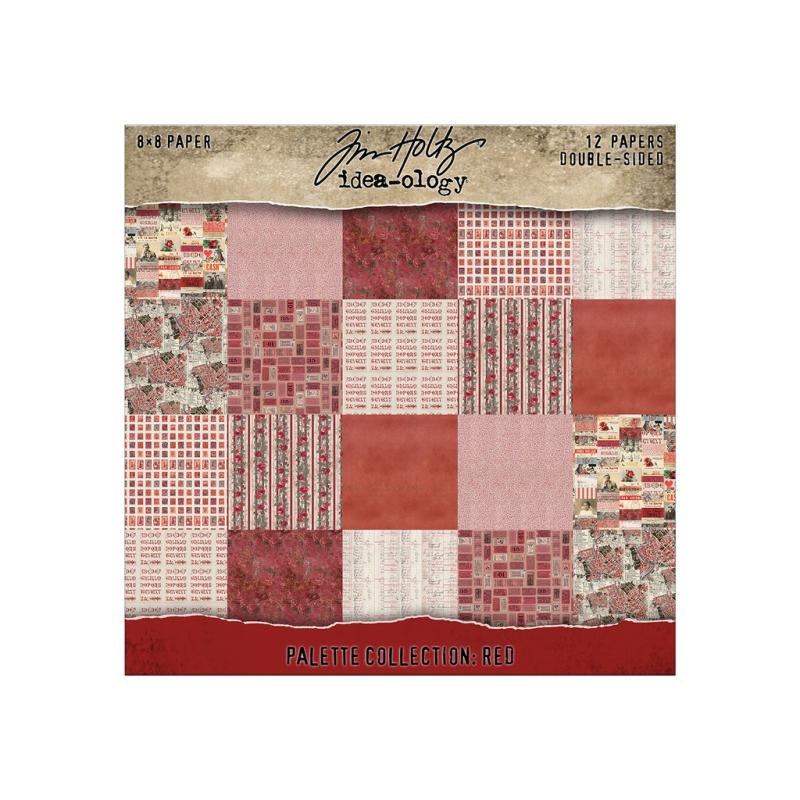
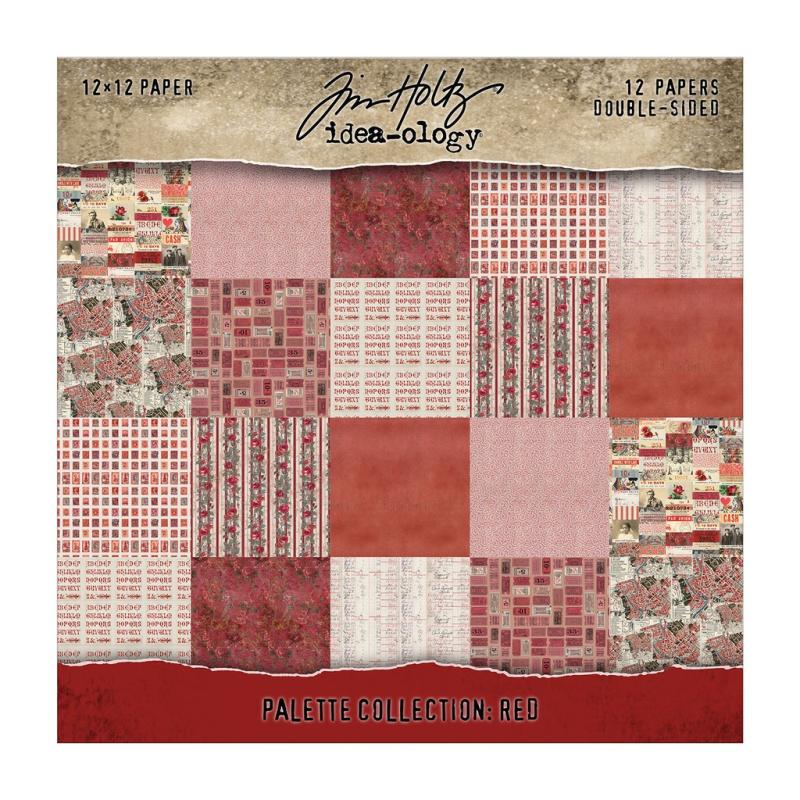
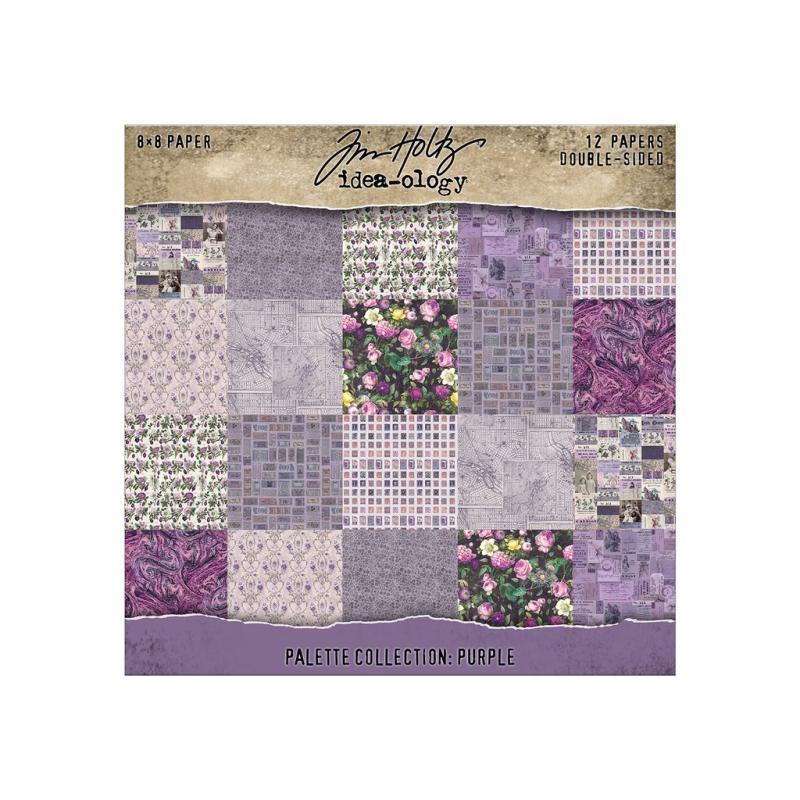
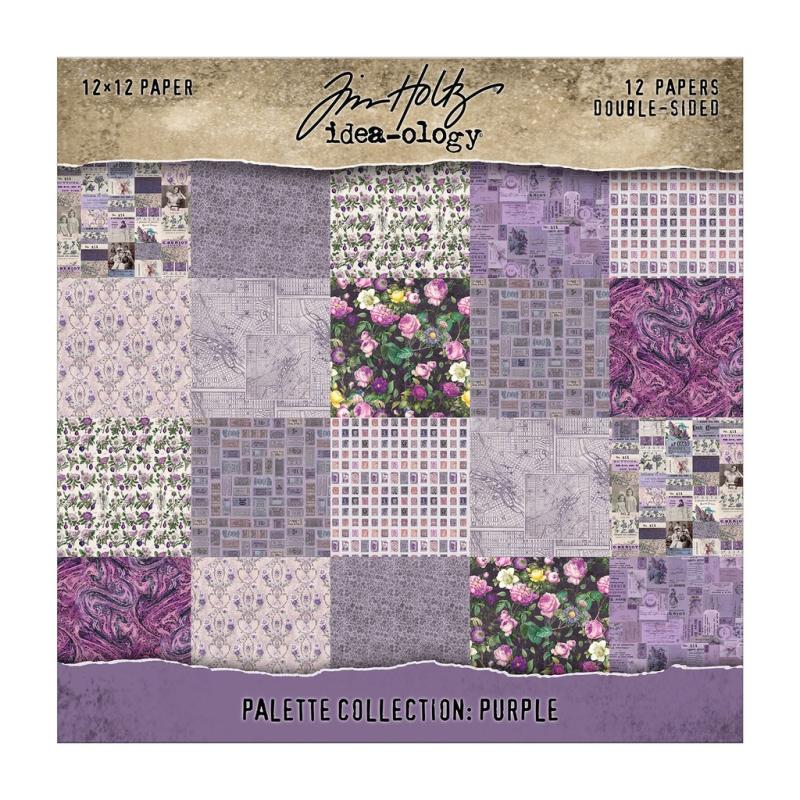
51:30 do need to go into the back of your account. So let's have a look at some of the papers. So these are the ones that we spoke about the other day. We've got the red, the purple, 12 by 12s. Go back and watch the show because I take them out. And then we've got the eight by eights as well. All at great prices, by the way. So your Tim Holtz 12 by 12s are £11-ish. Obviously, it'll be different in dollars. And I'm going to use these today. I've used this one and I've used this one. And now that they're mine,
52:00 I'm going to keep using them so they don't get put in a box. Okay? So I'm going to use these. But I'm also today going to use my foliage adornment, because I'm going to build a wreath with my die cut, which is nice. But what I am going to do is I'm just going to show you this. This is the one that I have. Now, listen in, guys, not that it matters to any of you lot that are on air now, but if you get a product that looks like this,
52:30 okay, gorgeous, and you return it like this, used, on a scrap bit of card in a broken cello bag, it's not cool. It's not cool. Don't do it, guys. You don't want it, just send it back how you got it sent, okay? Not like this. So I'm going to be using this one today because I hate waste. So, I think that's all I've got to say. Is that it? Can I chill out now? I think I can chill my beans now, can I? Is there any more admin?
53:00 Oh, and the Creative Edit. Oh, so excited about Creative Edit. Can I just tell you as well, I know I'm doing a lot of talking this morning, and I am going to do a demo, I promise, but I've got a lot to get off my chest. I've told you about most of it. But the Creative Edit is like a new chapter for Stamps By Me. It's sort of like, I know it's product and it's a sort of subscription, and if you buy the 12 months, you get the two months free. But it starts obviously next year. But it's a new chapter for Stamps By Me because that whole package is wrapped around our new system as well. So I know that we are going to
53:30 be able to 100% deliver on the Creative Edit without no drama, no problems. It's just going to be amazing because we're still half out of our old system, 100% into the new system. Things are getting a little bit confusing and we're just trying to sort of like amalgamate everything so it's seamless, so everybody's happy, including you as a customer, okay? So I'm so excited about that moving into 2027. 2027?
54:00 Let's not talk about it, right? Grab a cup of tea then, guys. Let's go. I think that's all I've got to talk. Sorry about the noise, guys. Sorry. I'll have two sets. It's fine. 7.89. Has that gone down since? I think that's gone down even further. So the eight by eight is 7.89, guys.
54:30 Oh, by the way as well, I've got some amazing a viewer Craft dies. Sell out risk. Oof. I did say that. I've got some amazing a viewer Craft dies on the way as well. So the pop-up ones, so excited about them. I love a good pop-up, particularly for a viewer. I'm more excited for a viewer because he's asked for them as well. So play with those as well at some point until my stock arrives.
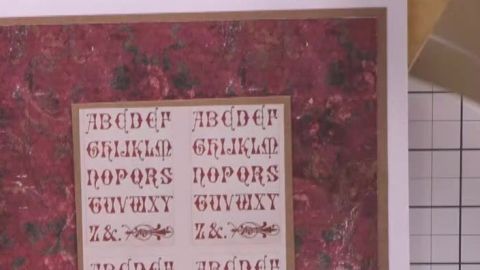
55:00 Right. Okay. I'm going to go red. Shall we? I'm going to go red. So we did red on one demo. We did a purple. I'm going to go back to red. I am going to stick with the eight by eight though, guys, so to not be wasteful. So item number for this one, Sierra Foxtrot One Eight Quebec Golf. Let's use this one then. "I Tim Holtz Idea-ology - Palette Collection: Red (8"x8")
55:30 use Stardust, Frosted Lace, Unicorn, and Icicles. I need more," says a viewer. I know. Me and you are hooked, to be fair. Like I said, a viewer's like me. We don't overconsume. We get exactly what we need and what we use, and then as soon as it's used, we Replenish. A viewer, I don't know if you'd heard me earlier, I've got copper now. I'll have to send you one in your next parcel. Very nice. Right. Let's get this. So I'm going to do a wreath with the foliage dies,
56:00 but I was hoping that in here there would be, yes, a plaque or a panel. There is as well. Let's have a look. So it's not Christmas, by the way. This has got some cards in, it's got some poppies, some postage stamps, some stripes, some tags, my old bookkeeping. I think I'll go with that one, that's a bit busy. Let's have a look.
56:30 They're all a bit nice. I think I quite like that actually. Shall we try this one? Because we have to do different each time, right? I'm going to try that one. We'll see. Listen, what's the worst that could happen? Or should we do a-- Well, let's go red.
57:00 Right. Let's go red. Oh, let's go both then. All different. Look. So what I'm going to do is, because we're going to do a wreath, I'm going to do a square wreath, guys. We've done circle, and I'm going to do a square card. I know, before anybody says, am I feeling all right? I am. I'm fine, promise. But I am going to do a square card. I'm just grabbing one from underneath the counter here. If I've got one.
57:30 They're rare. Oh, wait, I have look, got one. So let's do a square, and because we've got red and cream, let's do a craft border. So let's cut a border. So I'm going to go big on the first mat and layer, and then we'll go smaller as we go down. A viewer, you're always working.
58:00 She never has a day off. So we'll go craft like that, with the mat and layer like that, and then we'll do this one, next one down.
58:30 Has anybody got their Christmas lights up yet? Oh, hi. I hope you're well, darling. So we've got our text part there. So we've got two layers on this white card here. And then we'll keep these for now because I want to do a square panel, and I want to do a square wreath. So I'm just going
59:00 to move these to one side. Move that there for now. And I'm just going to grab another piece of craft to put them up there. Another piece of craft, and then what we'll do is just cut this in half so it goes through my die cutting machine. So let's cut some of this foliage adornment here. Put that up there. And let's cut, I love these.
59:30 If you haven't got these, I think most of you have got them. They're so cool. Fillers, wreaths, and everything in between. So craft card. Pop them on, get as many on as I can. So you get the sort of stamens with the holes out, so you can put gems, berries, buds, pearls. Then you get the ones that are filled in solid.
1:00:00 Some minis. I like the minis. I'm going to try and get them all in as much as I can. You'll all be screaming at me, going, "She's not going to tape them down. They're all going to move." This has. Now, can you put some in sort of a lot.
1:00:30 Oh, just go and ask a viewer. She'll do it for you, darling. She's watching. She's got me on screen. So I'm just going to try and get on as many as I can. What should I do with--
1:01:00 Just stand by, guys. This hasn't sold out. A viewer's just putting some more in stock here, or a viewer, one or the other. So there we go, look, I think I've done a good job there, don't you? There we go. Thank you. Let's put it back in stock, guys. And then we'll just run this one through.
1:01:30 Now I'm going to do this twice, because I'm going to need some fluff in my frame. Like so. And look here, watch. Look at this. I mean, come on.
1:02:00 Put it against my jumper. Here, look at that. So pretty. I love these for fillers, particularly if you're doing wreaths and cards, corners, like flowers on corners and things like that. Give them a wiggle. Hopefully, it's caught. Come on, be my friend today, guys. That's probably because that's at the top of the plate.
1:02:30 There, come on. Hopefully, that will look like it too. It might be a little bit of a problem, that one in the middle. Let's try. You're going to be my friend. Let me just put this one back. I told you the tip, didn't I? About cutting into... Just going to lay it back on, slide it back on. I told you the tip, didn't I, guys, about
1:03:00 cutting into a piece of card underneath if it doesn't die cut. I'm going to try and do it one more time. If not, I'll put a piece of card underneath. Just on the ones that I don't want to tear. Just angle it slightly as well, because sometimes that helps. And then we'll run this one through.
1:03:30 And we'll try again. Go back. That help. There we go. Beautiful. And there we go. Nice, right? So
1:04:00 move this one. I'm going to do it again. Oh, had a little sprig on there. Next one. I'm going to do it again, because I really would like a fluffy... Now, another hack is, you probably all know this anyway, you don't need me to tell you, but if you move the more intricate ones to the edge. Oh, that's got a bit of one in still, maybe.
1:04:30 That did it, though.
1:05:00 Have most of you got this one? I think you have, haven't you? Hopefully, you all use it. I don't ever shut up about it. All right, let's run this one through.
1:05:30 I'll just try and push it back one more. Maybe I don't have to run it through again.
1:06:00 And this one actually looks like a little heart, which is nice. There, look at that, down my cup there. Look like little hearts as well. More beads. Put pearls on these in your frame.
1:06:30 Looks like they've all been super kind and cut nicely for me this time, which means I can have a slurp of my coffee, I think, if that's done yet. Hopefully, that's enough. If not, we'll run some more through. Right. I'm not going to put them away in case we need more.
1:07:00 Don't forget as well, you can use this as a stencil. Oh, somebody's already just put that. A viewer's just put, "Use the waste as a stencil." I didn't steal your idea, I promise. Just put them up there for now. Definitely the leaves you could use as a stencil. Right. So let's see what we can build here. Slurp coffee.
1:07:30 Have you got your coffee, love? Make sure you check the CV schedule. Can you see it says, "Coming up tomorrow"? Thursday drop tomorrow. Right. I think we're going to need some shading going on here. So I'm going to go flat,
1:08:00 flat, and then I'm going to pick a piece from that red. Did I pick the red? Oh, what a plonker. I cut the red. Oh, never mind. I think that might be a bit busy. I'm going to go with the red as we can. And then I need, I'll go with a panel of this one. I'm going to cut a square out of here, so just move that over.
1:08:30 I'm going to go three and a half by three and a half. Okay, three and a half by three and a half. Yep, that's perfect. So let's get it on a mat and layer. "Use
1:09:00 yours all the time." Yeah, me too. Me too. Need to do some more, some to complement it ones. So there we've got sort of like our border there around the plaque area. So you can see where it's going, can't you? So I'm going to build a frame, like a twiggy frame around this. So let's start putting it together. Let's see if we can pull something nice together with the reds.
1:09:30 So we've got our base layer. Oh, you're off to the Remembrance. Oh, all the blooming days, I haven't got my poppy on today. I have worn my poppy for a week, but we did do our silence on Sunday. Yeah, and don't forget your one minute silence is at 11:00.
1:10:00 I will be off air by then anyway. My son had his poppy on proudly this morning. He was quite excited about it because he's got one that's like a poppy, and it's got a rugby ball at the side of it as well, which is really nice, which we got when we went to Asda, and he picked it himself, and we gave a donation. He's like, "Oh, this is cool." And he's like, "So do you know,
1:10:30 Mummy, that some people don't even know that the leaf on the poppy needs to point to 11:00? Did you know that, Mummy?" I'm like, "No, but you should tell them so they know, and maybe they don't know." Yeah. A viewer's got his on. Yeah, just said that. So let's do our panel in the center.
1:11:00 Now, let's have a think about what this is going to look like. Right. So let's bring in our lovely foliage. Now, I think we need to just add a bit of color to these, do you think? Let's just grab a brown or a bit of green/brown. Let's have a look.
1:11:30 I've got the Tim Holtz ones here, which were in the show the other day as well. But we have all the Tim Holtz in every single color. We've got Frayed Burlap and Forest Moss. So, we even have the new ones, too. I'm just putting a little bit of brown onto the edges. Not much, just to sort of like stop them from disappearing into the back of my card. I wouldn't use a brown with a red
1:12:00 undertone so much because it'll disappear into my paper, but obviously, it'll all depend on what paper you guys are using. Now, let's put some green on these ones. Thanks. Forest Moss.
1:12:30 I'm just taking a few of them. And if you spritz them with water as well, they do give like a mockldy effect, so experiment a little bit with a bit of color.
1:13:00 No, the oxides are in a gray one. The dye ones are in a black. There we go. So I've got a bit of color on some of them, not on all of them, but I don't even know if I'm going to be using all of these. But let's just get a bit of color on some of them because what I love about these is the tearability. So you can make them way smaller. You can just take the tip, this part, and you've still got this part. So, that's what I like. Do them super big, which means then you can go small.
1:13:30 It's always easier to go small than it is to go bigger, isn't it? So let's have a look. I think we need to-- I'm going to raise this and put some pads behind this one.
1:14:00 The center. Now we could build the wreath on top. Just going to sort of pull the sides a little bit. Like on top around or underneath around, I've not decided yet, but let me clean this counter here so we don't get a mess.
1:14:30 Doing our work, and then what we'll do is, let's see what it looks like. Let's just build it on the outside first.
1:15:00 Now these are still quite big, so they might need cutting down a bit, which is fine. Replacement.
1:15:30 I think because they're so big, it's looking a little bit overwhelming, but we can figure that out, right? You could actually do the crown horns. That would look nice, wouldn't it? See what that looks like.
1:16:00 I think I'm going to go with the crowny sort of effect there.
1:16:30 No, not working. Let's see what it looks like with just a corner. Do a big one.
1:17:00 Oh, we're getting there now, guys. And then we've got our, which I will put some sparkles on. Right, I'm going with that. Let's just start. Start, get it down.
1:17:30 Best glue ever. For a viewer a viewer from Fast Grab.
1:18:30 And then these ones, you put gems on, or pearls on these, and then you can sort of like... If you are watching on your phone, guys, you can click the screen.
1:19:00 I'll just show you. A viewer's got it here for you. If you are watching on your phone, if you click the item on the screen on your phone, you can add it straight to your cart, and it'll be quick, easy checkout. So you've got the adornments there, and then here we have the glue. Add to cart. Yes. Super-duper easy. If you're on your phone, so fast. So I think we'll, nice to put some curly ones in there, wouldn't it? So let's just go with that.
1:19:30 We don't want it to be too much, but we do want it to at least look like it's folded. And then to tie all this together, I think what I'm going to do is I'm going to
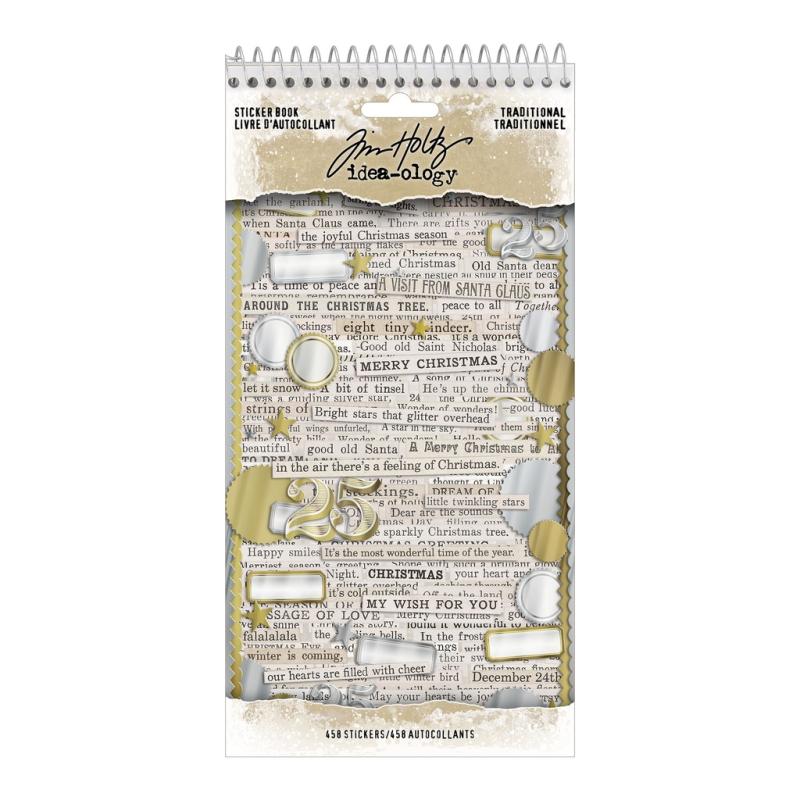
1:20:00 grab my washi tape. In the brown. Or you could use the new sticker books that you all bought the other day. On your engagement. Have a look. You made my day. To both of you. Oh, that's nice, isn't it? Shall we do those two? Then what we'll do is we'll put a little pad behind these
1:20:30 just to connect that corner a little bit.
1:21:00 And have it in the corner. So quite a nice, simple card, actually.
1:21:30 Those have looked great, by the way. And then we'll add some of the details. So I'm just going to grab my gold.
1:22:00 God. I need to get some more. I'm so out. It looks like there's loads in there, but there isn't hardly anything. Oh, there's some coming. Add some shimmer. Add some spots of gold on those little circles. Detail all the way up to the top.
1:22:30 So because we missed "Deal Hunters" as well, guys, we will add it tomorrow to my evening show tomorrow. So let's just add some sparkles to this, and I don't think it needs... It would look nice with a flower, but it's sometimes nice
1:23:00 not to have flowers on cards all the time, and I don't have a flower. I probably would put one on if I had access to one, but I don't. So it is what it is. Let's think of a color. Those creams. That. I'm going to go with these little bad boys.
1:23:30 Oh, let me just grab. An eye on that time. Let's put these on, guys.
1:24:00 So these are like an iridescent one to stop it from, I don't want it all to be red, you see, so I'm just going to pop these iridescent ones on. Not to worry, the glue will dry absolutely clear, so we're safe in that respect. I'm putting some on the leaves because it'll show a different color with the craft underneath when the glue dries.
1:24:30 So don't be afraid to put them on your foliage and on the center. And if you can, don't add too many, because it can be a little bit overwhelming, but if you just add a few, it can sort of like just add that finishing touch. One more there.
1:25:00 Any more? Oh, there's one there. That's it. Hello. And there we have just a simple card that is to the both of you on your engagement. Nice to not see a bit of white on there. Hey, I know the card blank's white, but there we go. So there you go. Let's just hold it up and show you. So those iridescent sequins, you won't actually see much.
1:25:30 It's just because the white glue is on. Can you see how that's dry and clear? So they will just catch the light as they pass. So really nothing too complicated, hey? You could do a flower if you wanted to. Build it up, put a big flower, put an image in the center, whatever you want to do there, guys. So there's today's demonstration. I am going to love you all and leave you all because we want to do our minute silence as well. So don't forget, I am live tomorrow at 6:00 for our
1:26:00 Thursday drop as well. And if you want to check out the savings on all of the products that I've used in the show, they're all linked below and are in the chat as well So have a look at those. And then on Thursday, tomorrow night, we will have a look at some deals because we missed Tuesday, and we'll do some more demonstrations tomorrow as well at 6:00. So that is it. It's cold today. Stay safe, stay cozy. Don't forget the recommend a friend, you get a tenner. You both get a tenner. Don't forget to do that one. And then we
1:26:30 plug on into the weekend with lots of exciting things still happening, but make sure you check your back office accounts. Lots of updates are going in there very soon, if I don't get answers very soon. So whatever you're doing, have a lovely afternoon/evening, and I'll see you all tomorrow at 6:00 PM for our amazing Thursday drop. See you later, guys. Take care. Bye.