0:00 One, two, three. One, two, three. I think that's quite good sound. Okay, that's okay. Yeah, I'd say it's fine. Still close. Check that three has got the right. One, two, three.
5:30 Good morning, new Crafty Brunch. Are you sick of seeing me yet? I'm sick of seeing myself, actually. Good morning, everyone. My name is Toni, and this is the How to Craft Network Studios.
6:00 Now, before I get into anything, I just want to say hello, our lovely viewers on Apple TV and Roku. Welcome to the channel, everyone. If you don't know who I am, my name is Toni, and we are a UK craft brand of 15 years, and it's super exciting. So now that you're here, we're not letting go of you, so stay tuned. We've got a lovely show lined up for you. So we've added more shows to our schedule with the hopes of increasing those further as well.
6:30 So today I have a Hidden Gems show because we stock thousands and thousands of different brands, and it's nice not to have to use my own all the time. I love my own brand, as you know. But it is nice to mix, as I know you guys do at home, so why can't I? Come on, guys, get behind me. So if you are brand new, we ask that you give us a thumbs up, some hearts, some likes, share the love of craft, whatever you're doing, have a cup of tea, and hopefully I will inspire you to dig out your craft stash and have a
7:00 play. Good morning, everyone. I hope you're well. So I did go home, I did go to bed, but yesterday we did a lovely show as well, showcasing some lamination stamps. So I do encourage that if you are watching for the first time, you might want to do a deep dive into our TV schedule because we've been doing some lovely demos of late using earlier products, new products, and it's just a lovely place to come and be inspired. So whilst the weather is not great, bunker down, grab a cup of tea, and let's
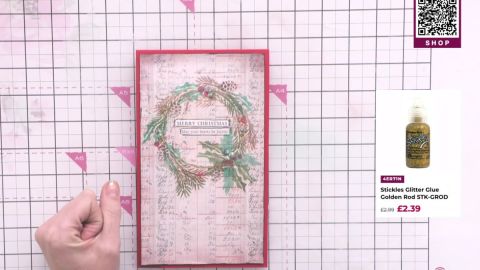
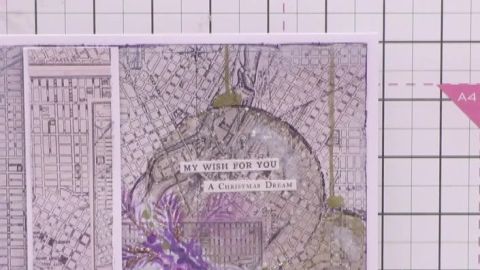
7:30 get inspired with one another. Before I do, though, I just want to show you the two cards or projects that we did last night showcasing how to use our lamination in a different way. So we did the sparkle lamination from the side with the golds and the midnight blues and blacks there, and then we did the watercolor face, face on. So I just wanted to show these because if you want to see how to do these, you need to go back and check last night's show because it was a lovely show. We had some lovely ladies and gents on.
8:00 "Loved yesterday's show," says a viewer. Well, I do appreciate you saying that. Thank you so much. And also, make sure you check out the how-to guides. Now, the how-to guides are everywhere for every show that we do, okay? So make sure you check out everything and anything because we are on fire. Are you guys on fire? Literally, I am on fire. And me and our team have just been talking about some awesome things that we're going to tell you about
8:30 tomorrow in our live show at 6:00 tomorrow night. And we've got some new stuff for you as well, as in back of office stuff. It's just going to be incredible. And I'm so excited about closing the end of this year on a super-duper high because our technology has just blown everyone else out of the water, and I'm super delighted about it. Hi. "I was just watching the show." A viewer says, "Hi, Toni, and everyone. I hope you're well." Have you got a cup of coffee?
9:00 So today is, we never go live on Wednesdays, guys. Normally, I don't have to have a wash or brush me teeth or anything, but today... I'm only joking, of course, I do those things. But I don't wear any makeup, but I've had to put some on for today. So it's our Hidden Gems show today, and as you can see on the screen, I've picked a few things that I thought, "Oh, these are a bit fancy," and I get giddy about. So I'm going to show you a couple of these products, and then I think I'm going to do a demo, but what it looks like, I don't know. So Hidden Gems show is a taste of me using
9:30 other brands and the most famous brands as well, which you all love. And I know you've all got in your stash because you all love and you all wait for the next launches. So I'm going to inspire you, if you have got the product, to play with them. But of course, they are available, and we'll pop them on screen in a second. And some of them are super-duper affordable as well, which is cool. We love affordability, don't we? So let's have a look at some of the items, and then we'll dive into a demo. What does it look like? No clue. But if you see any products on our website that are not linked to
10:00 Stamps by Me, that's okay, too. Have a look through all of the 30,000 products that we've got on there, and if there's something you want me to touch on or give a review on or demo or try, try before you buy, that's a good one, isn't it? So if you see something like, "I have seen somebody use that, but I'm not exactly sure how it looks, what to do with it," let me know in the comments or underneath this video, and I'll see if I can dig it out and play with it on our Hidden Gems show on Wednesdays, okay?
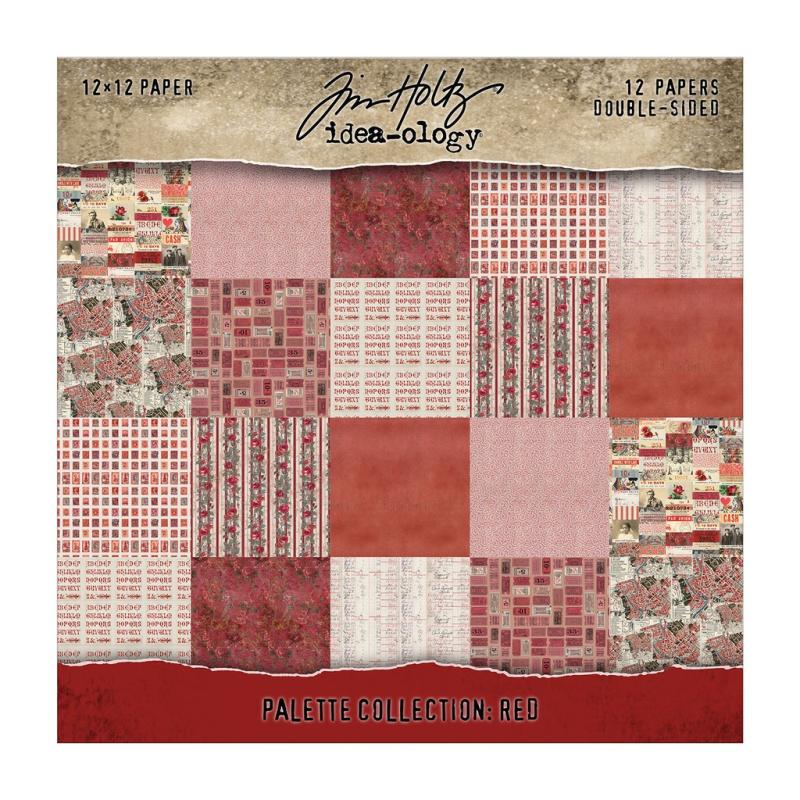
10:30 So make sure you also scan the QR code for the deal of the day. The deal of the day is unique to you as a customer, and it's in the back of your account. So check that out. It is awesome. Now, have I got my friends on? A viewer's on, too. Good morning, everyone. Is everyone okay? So let's have a look at some of the product. Now, let's start big. Go big or go home. So I've got two 12 by 12 Tim Holtz pads here.
11:00 Do I want to open them? No, I do not. I hate opening new pads. So let's have a look at some paper pads that I've found. Amelie like, "If you walked around our warehouse, guys, you would die." The stock is like, oh, my goodness. "Oh, yes," says a viewer. Well, welcome, sweetheart. So here is a Tim Holtz 12 by 12 set, and it's got... Look at these.
11:30 It is just delicious. It's obviously the red tone, so it would work for Christmas. And it has the poppies. It has stamps. It has the playing cards. It has the traditional stripe. I think I'm going to open this one. In fact, I'm going to open them all. Am I allowed? Seems like, of course. So this is 11.59. So it's not going to break the bank if you want some nice papers to play with. So let's have a look. So they're double-sided, too. Tim Holtz Idea-ology - Palette Collection: Red (12"x12")
12:00 Oh, excuse me a second. Put that on silent. Oh, this is nice, isn't it, guys? A little bit different. It's uncoated as well. So you've got your playing cards. You've got the typical Tim Holtz sepia tones, the black and white tones. This is nice, isn't it? I know. I think I might play with this one. And then you've got some on the back there as well. And then you've got the traditional little sprigs
12:30 on. Then obviously the tags, couldn't be without. That's nice, isn't it? Oof, that's my kind of world. Oh, that is nice. That reminds me of when my nan had the paychecks in the little brown envelopes, that one. Some mini stamps as well, always a winner. These are going to be brilliant for album-making. I can see why they've put two of them in, that's going to be super popular. Oh, yes. And then are they repeated? Yes, they are repeated.
13:00 Two of each, guys. Very nice. And they're totally uncoated. Oh, I tell a fib, there are more. That's nice, isn't it? Oh, yeah. And then some borders. Okay. Have a great day, darling. And then some sort of more borders here, broken up.
13:30 And then they're different on the back as well. So you have total option with that one. So that's the 12. The code is at the top, 38QDF8, at the top of your screen there. £11.59 as well. 12 by 12, that is a lovely, lovely price. I'd be happy to pay that, not a problem at all. These are why it's called Hidden Gems, because I'm only going to show you what I would want myself. So that is the
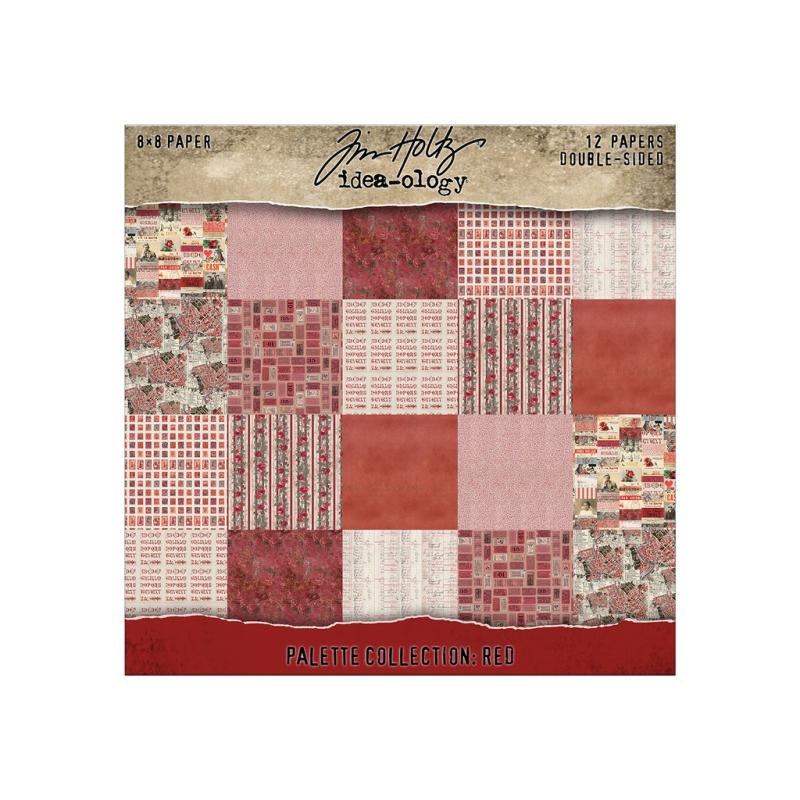
14:00 red one. Palette collection red. Let's just pop that up there for now. There is also, guys, a matching... I'm not going to open this one, but it's a matching eight by eight, which looks like it's exactly the same print, and it's just reduced in sizing on there as well. So absolute same concept, 12 papers, double-sided. So if you're wanting the co-- Oh, that's a sellout risk. £7.89 for this one, guys. Honestly, for the couple of pounds more, I'd probably get the 12 by 12. You get more value maybe, I'm not sure.
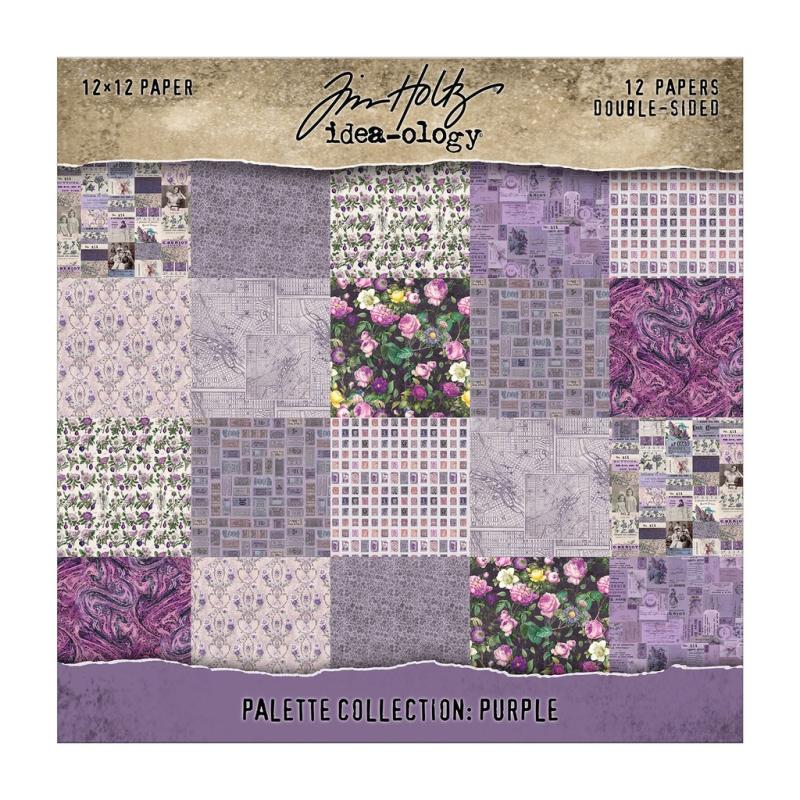
14:30 It depends if you like the smaller print. If you are making album, it's always nice to have both, to have a smaller print for tags and toppers. But equally, shop where you what sort of crafter you are. If you are an album-maker, you might want both. But if you are wanting value, sometimes a 12 by 12 can be better. And then we have an option of the purple. This is nice. So if you want to step away from Christmasy reds, maybe you've got enough red in your stash for Christmas, we've got this one. Now, this one's £12.59. Tim Holtz Idea-ology - Palette Collection: Red (8"x8")
15:00 So exactly the same concept. This one is purple, 12 by 12, double-sided again. "Reminds me of my nan and grandad." Yeah, it did me too. Let's have a look at this one. If you can share the show, that would be awesome. There's not many on of you today. However, there are a lot of you on the TVs in your home. Am I getting you all off YouTube and you're all going to TVs now? It looks like I've got no friends if you all just disappear. I'm only joking. Yeah, we've got a few on TV
15:30 today. Nice. See, I must be doing my job right. I must be doing it right if we're getting followers on there and viewers on there, too. So let's have a look at the papers in this one. So this is pinks, purples, dark greens, blacks. It looks like it's got the traditional square one on there as well. Let's have a look at this one. "Liked and shared," says a viewer. So kind. Let's have a look. Ooh, lavender-esque. Very nice. Tim Holtz Idea-ology - Palette Collection: Purple (12"x12")
16:00 Like this one a lot. And I think I like this one more than the red maybe, just because it's red and we've seen a lot of red up to the run of Christmas, so it's nice to change it up, I guess. Then you've got your tags at the back. This is like lacework, black and purple. Very nice. Love the pop of yellow. I'd wear that in pajamas, no problem at all. That's nice. I don't think there is... Oh, it's got the same back.
16:30 But they're different on the other side. That's nice, isn't it? Another one. Loving the shade of purple in this one. Pinks and lilacs, deep fuchsias. Then there's your lovely envelope stamps. Classic, that one. And another one on there. Oh, that's nice. I have never seen a map that's got a purple undertone, so that is very nice.
17:00 That's very appealing to me. And then some more lovely stamps on there. Oof, talk about a wild card in the set. Like that a lot. I might actually use that today. Nice. And then at the back, the borders. The borders are different, like on the other one. Borders different both sides.
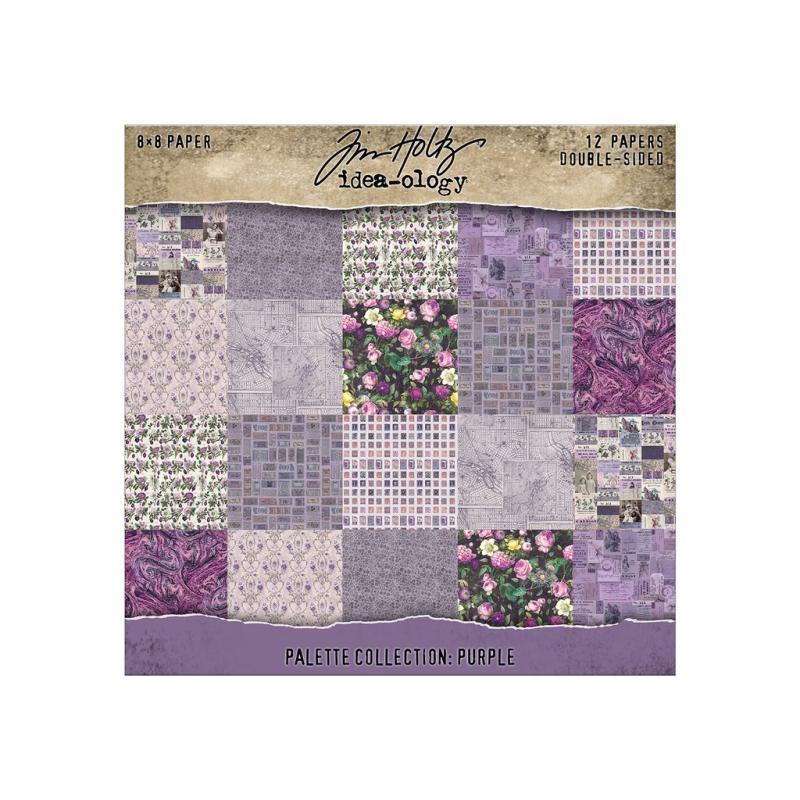
17:30 Two of those as well. So that is a 12 by 12. Of course, there is a eight by eight as well. I'll just quickly show you that. It's the same as the red one. So same print, just shrunk in size. They're very nice. Very nice. So just pop that up there like that. Hide it away. There we go. And then you get your eight, there's an eight by eight one as well. So again,
18:00 if you're wanting... If you just make cards and you're like, "I don't need a 12 by 12," I never touch 12 by 12. But please do know, if you have your envelope and board punch from me, the 12 by 12s are brilliant for making those four-inch by four-inch boxes. So if you're wanting color on the inside of your box and the exterior, these are double-sided, so you will get that effect as well. "I'm watching secretly while working," says Mama T. Oh, don't you be getting in trouble. Listen, if you need a letter of absence, let me know. I'll sign one off for you. Tim Holtz Idea-ology - Palette Collection: Purple (8"x8")
18:30 Right. Some other things that I have picked up. I found this. I thought this was quite cool. You know our washi tape? I love our washi tape, and we use them all the time, don't we? But I found this sticker book So this is Tim Holtz Ideology Sticker Book, and it's got lots of stickers in. Look at this. So you just peel them off and you stick them on your work. So if you're doing tags, cards, just put them on some black card and do a matte layer around. You get quite a few sheets, guys. They're thick. They're really thick. So you get a few sheets of the stickers. This is £7.59.
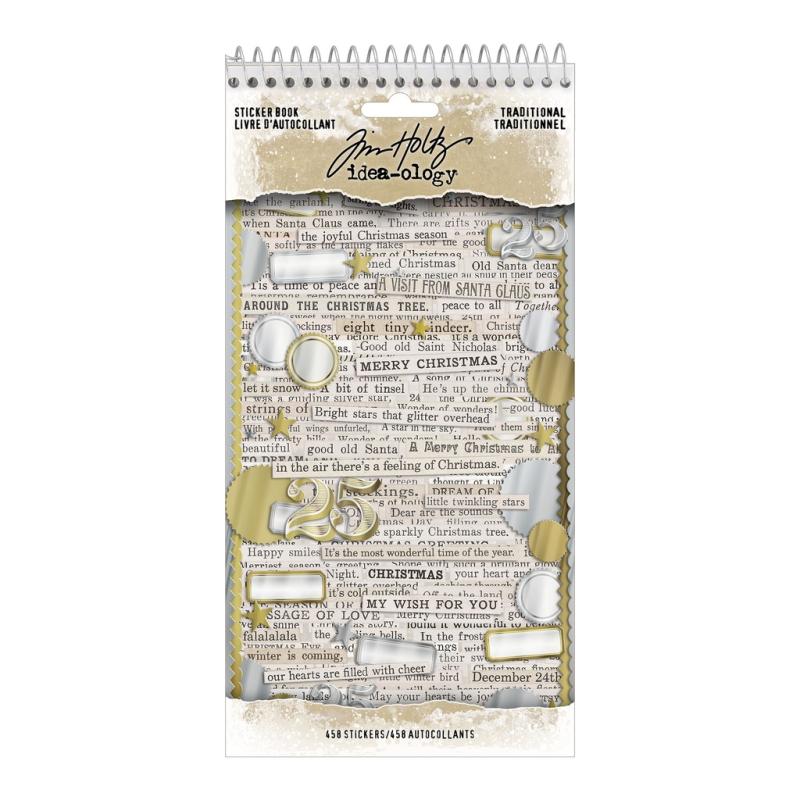
19:00 Absolute steal in my world, this. Not having to stamp. Very much similar to our washi tape ones. All different sizes, all different sayings. And then at the back, you've got some foiled 25s, you've got the strips, you've got the stars, and the silver as well. I like this a lot. £7.59, this one, for all of that. That's going to be under my table. I'll be using that one. £7.59. Delta, nine, golf, eight, three, November for Tim Holtz Idea-ology - Sticker Book Traditional
19:30 this one. I like that a lot. And then two other things I just want to show you real quick is this stencil. I thought, do you know, if you wanted to paint a wreath on your cards before the end of the year... Oh, we also have the red one. Sorry. We have a red one as well, guys, which I forgot to pick up. Beautiful again. Same concept. The one that I just showed you is golds and silvers and sort of like your muted coffee creams, whereas this one that is on the screen is those reds, very
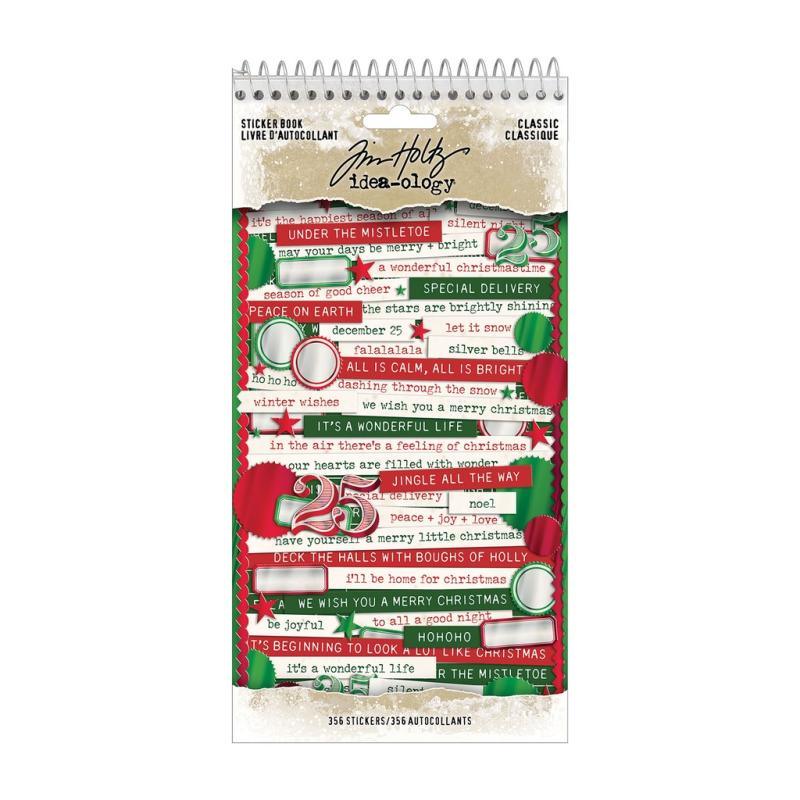
20:00 in keeping with Christmas, the dark greens, the bright, vibrant reds. Very holiday-esque. And then you get your white ones as well. I like that one, too. Can I have both? You can't have both. What does your mom say? "You can't have both. You have to need to pick." So I'm just going to look at this stencil really. I think I might use this as well today. I don't know what demo I'm going to do, but I think... So I like this, not because of its formation, but because I like that leaf, I Tim Holtz Idea-ology - Sticker Book Classic
20:30 like the sprigs, and I like the berries. And if I want to do a wreath, and I'm not the best colorist in the world or painter, I can use these as individuals. I might actually use this one. Might paint today. We'll see. So £8.39. This one's a sell-out risk. £8.39. Five, two, November, seven, Sierra, four for that one. Okay. £8.39 for that one. And then the last one is one that I thought if you are having a clear-out, or getting ready for Santa, or trying to get organized, you need these in your life. I mean, who hasn't got these? You've all got the little minis. If you've got mine, the Tim Holtz, any, you need
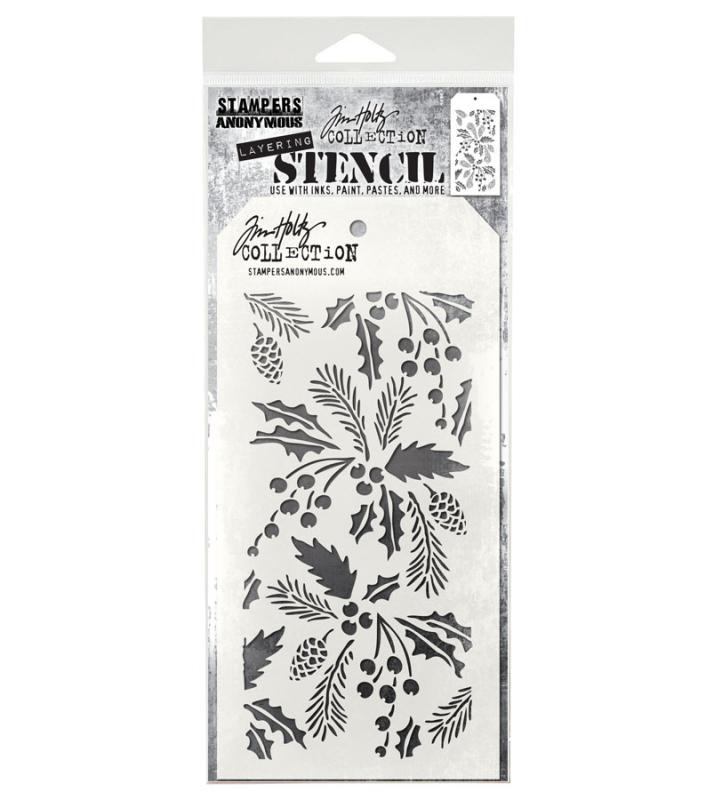
21:00 to get these. These come back in stock last week. Okay. So £9.89 for the tin to store your little mini one-inch cubes. Stock up on these, guys. Probably the best price you're going to see. They were back in stock last week. If you have the cubes and they're all sat in boxes and you can't visually see the color, you need to invest in these. I've got tons of these. And I have stolen three this morning. And the reason why I like them is the window. I can see the color. Tim Holtz Layering Stencil - Festive
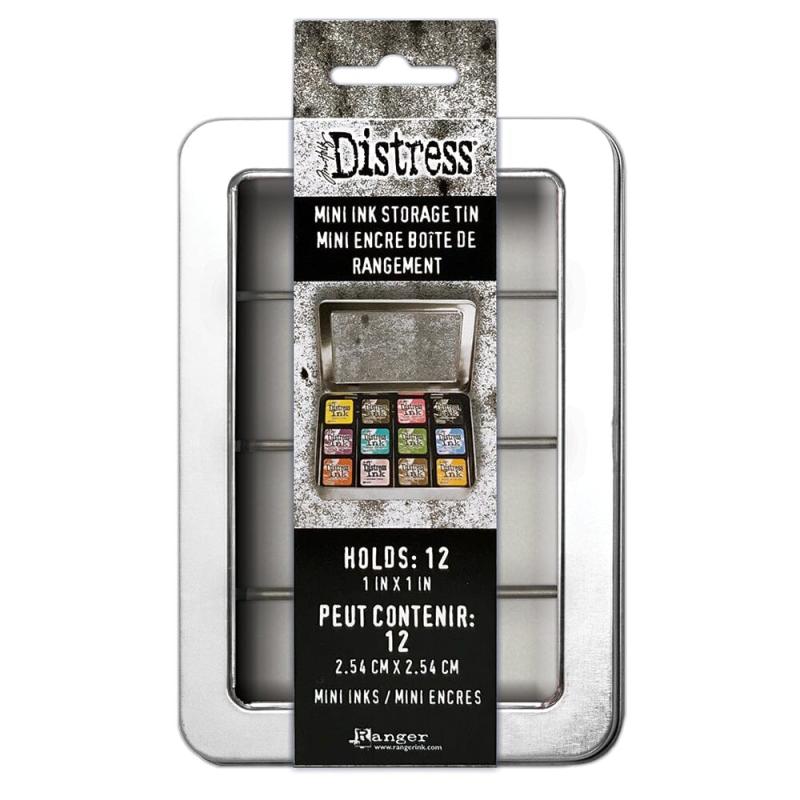
21:30 If you can see it, what do I always say? If you can see it, you'll use it. Not in boxes all stacked on top of each other. No. So there's that one as well. So stock up on these. Get organized, guys. Right. So that's that. Shall we do some craft? I did like that... I'm going to use this one. I'm going to use the purple eight by eight. I'm going to take one of those muted tones. Oh, wait. Hang on. Tim Holtz® Distress Mini Ink Storage Tin
22:00 I think if we use this Christmas stencil, I'm going to have to go with the red. So I'm doing a Christmas card. Listen, if you haven't started, you need to get started. So let's do a red, and I'll use the little mini pad because I don't want to waste. So let's use the eight by eight red. I'm going to use the stencil as well. So let's get jiggy with it. What are we doing? Sell-out risk on the pad. Okay.
22:30 So let's have this one. So as I stated, the papers are exactly the same. They're just muted down. I think we're going to have to go for that. I think we're going to have to go for the one that I liked, that reminded of our grandparents. This one. Let's go for this one. So we're going to do... Although the papers are not really Christmas-themed, the sentiments are, guys, but these are not.
23:00 But I'm going to make it into a Christmas card. I'm going to make it work, okay? Now, shall we do a DL, a slim DL? Let's think about it. So I have a red card as well. So let's go with a red card blank because I need to use these because they're stacked up here, and it's not very often we use red, is it? So let's get a red card blank. And I think we need to just make it a... I don't want a big five by seven today because it's
23:30 going to be a lot to ask of me to paint. So let's just ditch some of the side of this card, like so. "I need to start," says a viewer. Oh my goodness. Oh, I know your pain. Although my sons... Has anybody else got somebody in their family that quite randomly goes, "Can we do this?" And it's like at the most obscene time. Like last night we sat just on the sofa and a viewer said,
24:00 "Can we make some Christmas cards?" I mean, we have already made a few, actually. Not very many he hasn't made this year because he's getting older, but he has already made a handful. "Can we make some Christmas cards?" I'm like, "I haven't got much at home at all." He's like, "Well, can we do it tomorrow?" I'm like, "Yeah." It was like 20 past 9:00 at night. I'm like, "Where does that come from?" Crazy, right? Children. Right. So I've cut that red down, and I've taken that... I love this paper.
24:30 Love, love, love. Right. So what I'm going to do is, shall we make a bit of a distressed card today, seeing as we're playing with Tim Holtz, and that's what he's really cool at? So we'll try and get my version of distressed. Right. So let's get a bit of color on here. Let's get some color on here. Right. I'm going to grab my white ink pad, and I'm going to try and push the design back, make it look like
25:00 washed wood with text underneath. So I'm going to take my white, and I'm just going to put my white on here. And then I'm going to spray with a bit of water. And then I'm going to get a brush, my brush, and I'm just going to pick up some of this white, and I'm going to try and get some of that white to push it back. Because it can carry a bit of water. It is uncoated. Let's make it a little bit more intense.
25:30 Can't really see it much, but it is there. Just pushing that. Can you see it has pushed it back. Could actually take the ink pad straight, I guess, if you wanted to. Have a try. You want it even more whiter, push it back.
26:00 There we go. That is the white. It's on screen, guys. The best white in the world, in my opinion. But who am I? Right. Let's clean my mat. So I've pushed it back a bit, and then I think I need... I have got a cup. So what I'm going to do, just tip the excess off there.
26:30 Let's just dry it off a little bit with our gun. Watching about 15 minutes behind. It'll be okay, Rosemond. So I'll just dry it off a little bit. STAMPS BY ME - PREMIUM PIGMENT INK PURE WHITE - COTTON...
27:00 So, in a sense, I just made it a little bit lighter. Look, this is the piece that I cut off. Can you see? It's less red. Not very much, but enough to push it back, because I want what I'm going to do on the front to be the focal. So, let's get a cup. This is where we start getting jiggy with it. So, if you have maybe some gilding waxes, we've got loads of the Cadence waxes, or our confetti inks.
27:30 Still waiting for, by the way. Anything that's like goldy, metallicky, we have tons of the Cadence on the website. Type Cadence in. These are amazing. Absolutely amazing. So these are your finger wax. Okay. So you could use this. Let's try two options. Let me see what I get the best result with, okay? Because it is all about sort of like hidden gems today. So let's try. So I'll try the gold,
28:00 and we'll try a Cadence. So what I'm thinking is, let's just grab this. If I put some around this cup. You're all like, "What on earth is she doing?" I don't know what I'm doing. I'm going to take some of the wax on my finger, and I'm going to put it around this cup lid.
28:30 Looks like that, look. And then let me just try it on this bit of paper here. Can you see the gold circle? Yep, it's there. It's definitely there. Look at that. It's cool, isn't it? Think I need more on there, but you get the idea, yeah? So I actually will use the Cadence. If I don't get it bright enough, I will go on with my... But these are amazing. Look how much. You know how much I love mine. Cadence Finger Wax - Green Gold
29:00 I have most colors underneath here. So I'm just going to take that gold again, and I'm just going to splodge, splodge, splodge all the way around the top of this cup. Now, anything with a circle at the top, a lid, whatever you've got. I've just got this because this is all I've got. So I'm just getting that gold. And then what we're going to do is we're going to create like a wreath. So I'm going to take it on top of the paper that we've got going on here, and I'm Cadence Finger Wax - Cobalt (20ml)
29:30 just going to stamp, press it down. I don't want it to be perfect. There we go. Can we see that? Oh, yes. That looks so good. All right. Let's do it again. I want like a bit of a wonky wreath. It don't want to be perfect. So I'll just take the wax again, tap it all the way around. Can you see there? And then I'm just going to put it down, but I'm not going to level it up. I'm just going to sort of like drop it a little bit off to the side. See? Cadence Finger Wax - Purple (20ml)
30:00 And then maybe the excess we'll just splodge around again, see if we can get a little bit. So I've got that so far, guys. Can you see that there? So let's just grab some tissue and clean. Just clean that cup off there. Like I say, you could use, if you don't have
30:30 that, you could use a metallic paint maybe. Paint some paint on. But I like that. And then, what we will do is let's mimic some leaves, and this is where that amazing stencil comes into play. So let's just grab the stencil I love stencils. There's a stain you stash forever, guys.
31:00 It's not like a one and done. So let's mimic some leaves around here. I can't see. We've got some lovely holly leaves and some berries and some fern. So let's get a blending brush. Yeah, let's use this one.
31:30 And let's get some green. Now, we want it to be subtle, so I'm just going to take the green, and we will tap it off here. Don't want it to be super bright. And we'll take the leaf. So remember, this is just a backdrop, okay? Nothing's fixed in stone.
32:00 So we've got a little leaf. Let's twist him. So we can make it as full. Can you see now?
32:30 And then you do berries and buds and things, so I'm going to keep going. Maybe, is there a smaller one? These two look nice. Let's do this one. And I'm just going to try and create a little bit of balance, I guess.
33:00 I'm going to stick with the same green for now. Let's just get the wreath full, okay? So.
33:30 What shall we do? Let's get a different formation of one. Here's a different one look. There we go. Let's get him.
34:00 Coming together nicely. And then we have the ones with these ferns on here. Now, we possibly could do some browns with that one, couldn't we? So let's grab a brown. Just trying to grab another brush.
34:30 Trying to grab a brush that's in the same family, so we don't make a hash. Just cleaning our brush, guys. So let's get the brown this time, and let's use some of the wooden elements. So I'm just going to pop him in here.
35:00 So you can now see it's starting to come together with the woody bits.
35:30 Maybe change it up, so they're not all perfect. So let's put one going in here, and then one going out, so it just doesn't look like a sterile formation, you see? One going in and then one going out. Yeah, so it's sort of like maybe do a double whammy here.
36:00 Fill him out a little bit. Let's do a little baby one here. I love how the stencil's got all the curves. Perfect for a wreath. So you don't have to think about it. They're actually built on a curve. They're not straight. Looking good. Now, there are some pine cones in here as well, but I feel like the pine cones could be a little bit darker.
36:30 So let's just see if I've got a darker brown. Also, I've got a lovely distressed green down here as well, which I'm going to grab. All the distress inks are on the website as well. We pretty much house everything on the website, everything and anything. Let's just see. I might do a bit of black. I think black. I won't press on hard, and we'll get a gray. So let's take this black and see if we can get some little pine
37:00 cones in here See the little pine cone here. So let's just do maybe a brown. Is that brown? Yeah, brown, and then just a touch of black on top just to make it a little darker. Oh. Very nice. Let's pop another one on.
37:30 So filling out that wreath beautifully. One up here.
38:00 That is looking scrumdiddlyumptious, I think, in my world. Let's have a look. We've also got some buds here, some white. Can you see there the berries on the sticks there? I think I'll do my own buds, though. Should we do our own buds? Yeah, we will. We'll do our own buds. But I think I need to do some of this lovely green, so it's
38:30 not just all like that solid green. Let's do a foresty type style green, too. There we go, guys. Popped up all the Tim Holtz. There's all of the regular Tim Holtz ones, and there's all the fusions as well. So check them out. They're a really good price. Every brown, every green, every shade you could possibly need to create
39:00 nice cards. So let's do... What other leaves have we got? Shall we do some of the green? You could absolutely go to town and make this so full. But imagine if I'd used a bigger cup. Could you imagine? It would've looked... You could do a really big wreath, excuse me, on a seven-by-seven card or something like that. So, don't shy away from it. Let's see if we can get a bit of green, a different shade of green, in these sprig. Oh, that were a bit dark. Didn't expect it to be that dark. That's going to really...
39:30 Let's put some more in up here. So just try and stay with your circle formation, but do some sticky out ones and then some flat ones as well.
40:00 Now we're getting full. Looking pretty awesome, right? And maybe just something up here to tie that green together.
40:30 That looks good. Now, we do have these here. I'm just going to overlay some of the sort of holly leaves as well in the different color. So we've got a nice big build up here, because this is going to be sort of the focal here, I guess.
41:00 Turn it round and maybe do this one going in. That's it. And I'll do another little one, maybe just here, just with the one leaf.
41:30 There we go. That is so cool. Right. Now we need... Let's just get rid of these for now. That stencil is going to sell out, guys. Let's just get rid of this. There are the berries in there if you are not sort of too precious and can't do them yourself. There are the berries in there.
42:00 You could use those earbuds as well to do the spots in the gold and the red. I am going to use this for now until I find something else. So let's just get another brush. And let's pop some berries in here. I think I need some smaller berries, though. Is there some small ones? Yes, there is. Thank goodness for that. So, going to just put my finger there so I don't get red. Just going to lightly tap.
42:30 Just get a little accent. These are just under berries, because I'm going to paint my own berries, by the way, guys. Let's just pop a few of those, dotting around. Not too many.
43:00 Three little ones like that. And then what I think I'm going to do is, because I come up with all these bright ideas, I do have my red Gossip sparkle pen.
43:30 So I think I'm going to paint some on. Just enhance the ones that are there.
44:00 Just a little bit. Because it's such a fine nib, it's hard to get a perfect circle. It's still not as intense red as I'd like, but I know how to solve that. And then before we do anything else, I'm going to go back to the Cadence,
44:30 okay, and I'm going to take the... "Love this." Oh, thank you. Something a little bit different, hey? We like to do a bit different sometimes. And then we'll grab, if you've got maybe a brush end, something like this in your stash with just an end. Maybe could do with a bit smaller than that. Let's have a look. This might be okay. We'll try it. And then all I'm going to do is I'm just going to take my brush end. Let me just clean that green.
45:00 I'm just going to pick up some of the wax from on the end here, and I'm just going to spot some circles. We've got some gold berries, too. Just random, so it catches the light when it's on the side. Bit of texture.
45:30 Not too much. You don't want it to overwhelm. I think that'll be enough for now. And then, what I'm going to do is I'm going to grab my sequins, my gems, and I'm going to put some physical gems on, like solid, deep colors. I think this is looking pretty awesome, guys.
46:00 So, she says. There they are at the back. So, and then I'll use some of those stickers from the sticker set, and we'll sort of put a fine liner around this. So I'll just get some gems. Let's stick some gems on it. So have I got some red? Let's have a look. Or greens. These ones would look awesome, I guess.
46:30 They would look awesome. Could do like a red, berry red-esque. This is your, it'll come to me in a second. I think we should put some of these on. Neat and tidy.
47:00 Let's grab some glue. I'll just use those ones. I was looking for a red. Oh, I do have my red pearls, guys. Red pearls. You've all got this stuff in your stash. You don't need me to show you. Let's just put some of this greenery on here. Oh, our team's popped up that storage if you want to get organized, guys.
47:30 Really need to get your craft stash organized. It's nice to be organized. I look like I'm organized on telly when I'm live with you guys, but honestly, it's chaos. Absolute chaos. Let's just clean my glue. And then we will stick some of these lovely green diamontes. That's just going to give us that lovely sparkle. Now my glue.
48:00 Now, this is dry clear, so don't worry too much. They say rule of thumb is threes, isn't it? So, I'll do three on that little bouquet there. I'll just let that just go tacky a little bit. And whilst that's doing its thing, where is that sticker book? So I will get the sticker book. 100197 - HTCN - STAMPS BY ME NEAT & TIDY MULITFUNCTIONAL...
48:30 Now, I might just put the sentiments inside. I just saw a Merry Christmas. Here we go. This one's nice. So peel it off, and then I'm going to put it in the center like so. You could put a few. Merry Christmas.
49:00 It's the Most Wonderful Time of the Year. Of course it is. Merry Christmas. Fill in the stockings. That one's a nice one. Happy smiles and twinkling eyes. That's nice, too. May your hearts be joyous. Let's do that one.
49:30 We'll do it off to the side. So it's the same side as this side, so it's all to the right. And then what we will do is we will grab... Not that one, it's too thick. If you have a fine liner pen or a biro, for that matter, it doesn't have to be a fine liner pen or a pencil. Oh, here we go.
50:00 All the gear and no idea. Let's see if this fine liner pen works. And then you just take your fine liner pen, and I'll put those gems on in a second, and you just sort of like draw around. Not perfectly, guys. Remember, not perfectly. And it just pushes it back and stops it from being sterile because it looks like we have painted it a little bit, right? See? And then if you want to do a double line, so it sort of looks a
50:30 little bit more grungy. You see our team doing this all the time, don't you? I'm not as good as him, but I will still give it a twirl. Like so, and it sort of pushes it back a little bit. So let's put these gems on.
51:00 I'll tip my gems out. Can't see. Blind as a bat. Let's just get rid of that. "Love this." Oh, thank you. None of you are hardly talking to me. Is that because you're all busy watching? Don't worry about if the glue splurges out, because it's a
51:30 dries clear glue, and it's a glue I always use, which is on the website as well. Lots of you now use it due to my recommendation. It is absolutely fab. That's that one. Stick this one here, one here. Two there. There's two there. Should probably put a third on there, to be fair, shouldn't we? So it's in the rule of threes.
52:00 It doesn't look like they're sparkling at the moment. It will, trust me. It's just because you're looking on the overhead. Oh, that one's done. And that glue will dry absolutely clear.
52:30 Chuffed with that, guys. Now we need to just distress the edges just a little bit in the brown. Is that brown? Yeah, we just need to pull your eye into that wreath, so I'm just going to go around with the ink that's on this brush. Got a bit of brown on it. So I'm just going around, just pulling your eye in a little bit. Don't touch the gems. Dry Clear Glue 8Oz.
53:00 Now, you could wrap some twine around the bottom. It just pushes it back a little bit, and then we will put this on our card. Oh, I've done that, but I'm just going to grab the brown again. Mind, let's do the black. Got a black ink pad here, and then I'm just going to take the black and edge. Tilt your ink pad in a little bit. It just stops the harsh white edge, makes
53:30 it look a bit distressed. You can distress it a little bit further with your scissors if you want to. And this one is black soot, if you've got this one. See how it just sort of gets rid. And then when you put it on the card, it stands proud rather than sort of disperses into the background. A viewer says, "Beautiful, Toni." Thanks. I'm not bad when I give it a go. I'm not going to stick it, guys, because I can't. Well, I'll try, but I'm going to ruin my gems because they're not stuck.
54:00 I'll try. Don't want to not finish the card.
54:30 A bit wonky there. Straighten it up. There we go. And there you have it. Okay, I would actually even go as far as getting my Stickles in. Sorry, I'm using everything today. Poor our team's chasing me around like you can't imagine. But you've got your Stickles, and your golds, and your iridescents, and your silvers. I'm going to put some gold sparkly ones as well, just because we can. Tim Holtz - Distress - Ink Pad Black Soot
55:00 I've got it in my stash, so I'm going to use it. Add a bit of gold onto the sprigs. I'll show you on camera in a second. Add some gold to those sprigs So I've got a bit of gilding wax, we've got a bit of sparkle pen, we've got stickles. So dig out your stash. If you haven't got them, everything is available, but hopefully,
55:30 lots of you will have some of these lovely products. And if you are buying any products, make sure you get the products that you know you can use year in and year out. We always use gold, we always use iridescent. The red are brilliant for berries. So get the ones that you know you can use, and there it is with its all glory, all that lovely sparkle in there as well. So there we go. So with that particular card, I used the sticker set, which is on screen, Delta 9 Golf 83N. That's your sticker bundle with the
56:00 gold and silver stickers at the back and the words, which you can see I've used in the center. Then I used the amazing stencil. Just wash it under tap, put it back in its packet. You don't have to just do wreaths, though, guys. You could have done a border, so a piece down here, some lines in gold, and then done all of the lovely berries and buds and sprigs down a border. Just because I've done it in circle formation does not mean you need to. You could also do baubles. Stickles Glitter Glue Golden Rod STK-GROD
56:30 So if you did a tie up here, you could do some beautiful full foliage baubles as well for Christmas if you want to. So that's that one. That's at sell-out risk. That's $7.89. And then the papers are just from the smaller paper pad, which is the Tim Holtz red one, which is this one, with all of those lovely double-sided papers in there as well. And there is a purple option as well. So if you've just tuned in a little bit late, go back to the beginning of the show and watch the beginning of the show because there are some lovely items I've shown
57:00 you today. And if you are trying to get a little bit organized, you have your storage tin with a visual of all your colors, so you're not faffing. And if you do like to be neat and tidy with all of your gems and things like that, of course, you can get organized this way as well. So lots of options for you there, guys. So there are Toni's Hidden Gems today. What will it be next week? Not sure. I didn't even know that demo was going to be the demo that it was. But I've also, as well, popped in some of
57:30 the sprays, some of the holiday sprays or Christmas sprays. So you've got your vintage on the right with the burgundy, the blue, and the green. And then you've got your lighter traditional pops of red with that cranberry undertone on there as well. They're $9.89. You get three, and they've got shimmer. They have mica in them as well, so just bear that in mind. But again, if you're painting, the sprays are brilliant. If you're painting the leaves and not using a stencil, I would probably say combine
58:00 both. If you have the courage to pick up that brush, paint some leaves in yourself as well. So we'll be picking up that brush very shortly anyway. So there we go. There is Toni's Hidden Gems. If you can share my show, if you've enjoyed the demonstration, can you share it in all of your crafty friends groups as well, and let's get people on the channel. If you've noticed, we have our brand-new TV schedule dedicated on our website, and we have different shows for different days. And with recent events, we wanted to sort of bring the channel
58:30 to you on more occasions, so you get more inspiration, so the community can connect further and get more inspiration daily. So whatever you're doing, have a lovely day, guys. I will be doing the school run soon, not after I've had a mince pie, though. And I will see you all tomorrow at 6:00 p.m. UK time. So if you are anywhere else in the world, check out the schedule because it is dedicated and bespoke to you as an individual. And don't forget, as always, your deal of the day is for you as
59:00 well. I'll see you all later, guys. Share the love of craft always. Bye.